Loose, shine-free, textured waves are my favorite kind of hairstyle. It’s fairly easy to replicate the look on myself because my hair has some natural wave to it, so the bias is obvious. However, I do love the different which-ways you can make waves go, and I like their easy, laid-back feel. My friends will tell you that one of the ways I express friendship is by “waving” your hair- I’m not kidding. It’s the most relaxing process for me. And just the word “wave” evokes peaceful memories of the ocean, and being a California girl, that’s never a bad thing. Although, authentic “beach waves” with a bit too much salt going on can get a little crusty if we’re honest. There’s a difference between looking like you spent a weekend at Laguna Beach or a year on an island with Tom Hanks in a loincloth.
When I create my own waves, I go by a couple tried-and-true tips so they don’t look too neat, but I do want to make sure they have plenty of body. If you have curly hair, the general method is to blow your hair out straight first and then create the waves, but that’s a lot of heat and effort so I understand if you bypass this how-to with an annoyed eyeroll. I’d encourage you to still give it a shot though, when you’ve got extra time just for fun! If you have stick-straight hair, this may still work but you will probably want to crank the heat on your curling rod and a good dose of hairspray won’t hurt, either. Regardless, see if this works for you too. I love straightening my hair when I have time, though it’s a different kind of vibe with bangs. Making my hair extra curly is the hardest for me, but it’s been really fun the few times I’ve executed it well. Waves are just the easiest for my hair type, and here’s what I do to get them.

Step 1: Freshly washed hair works best, because you can rough dry it and give it serious volume. I’ll wash and condition my hair, comb it through with a wide-tooth comb and a few sprays of Unite’s 7-Second Conditioner, and give it some time to air dry. This allows at least a little natural texture to come through, which is good. If I’m doing my makeup, I try to take this time to apply moisturizer and get my face makeup on while my bangs are still pulled back. Once my bangs are dry and styled, it’s hard to do my makeup without messing up my bangs.
Step 2: After my hair has had a little time to dry (think like, 60% dry), I’ll use a blowdryer to rough dry it the rest of the way. No brush required (except for the bangs, just a little bit)! I’ll flip my head upside down and all that, and just kind of go at it until it’s dry. You don’t want to lay a heat tool to it while it’s still damp at all, or you’ll basically boil your hair. After it’s dry, I spray some more heat protectant on it and let that settle for a minute.
Step 3: I wave my hair in three sections- bottom, middle, and top. I’ll use a clip to keep the upper sections of my hair out of the way as I go. Using the Hot Tools 1.25′ curling iron, I’ll take small chunks of hair (probably 1-inch sections) and wrap them around the iron. The key is to not use the clamp; just wrap the hair around the iron and hold it there for a couple seconds. When you wrap the hair, don’t wind it tightly around the iron; think more of a languid, ribbon-around-the-Maypole kind of wrap as opposed to tightly winding thread around a little spool. You want these waves to be loose and lazy. Also, I try to not wrap hair in the same direction every time. I try alternate between wrapping forwards and backwards, although if you wrap in all one direction I actually don’t think it turns out that bad. Another thing- I leave the ends out! That’s a big part of the beachy feel; don’t wrap about the last inch of hair around the iron.
Now, I suppose you could just use a curling rod for this whole process, but the results with a rod are almost a bit too precious from my experience. The best rod I know of is the Sarah Potempa BeachWaver, but Hot Tools costs a fraction of the price and they yield the same results in my opinion.
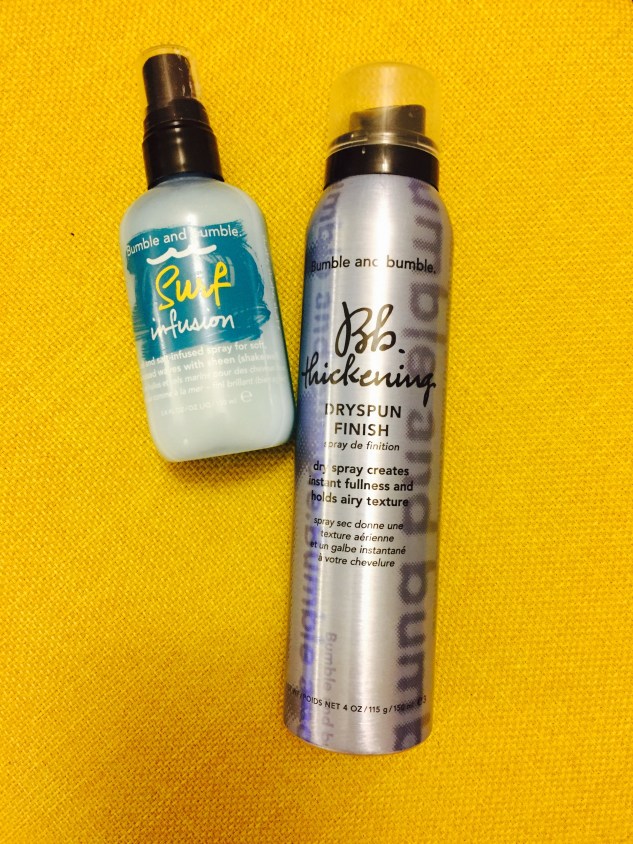
Step 4: Time to apply texture product! As you curl each section from bottom to top (and by curl, I really mean wave), liberally mist a dry texture spray all over the waves you’ve created. I like Bumble and Bumble’s Thickening Dryspun Finish and Oribe’s Dry Texturizing Spray. Spray it into the roots and, as you go through each section, flip your head upside down and shake out your waves with your hands. Additionally, take another texturizing product that isn’t dry, like Living Proof’s Instant Texture Mist, and apply it to the ends. I spray some of this into my hands (because it can be sticky) and scrunch it into the midlengths and ends. I love the effect of this particular product; it gives a piecey-ness to the look. You can also try a wet sea spray like Bumble and Bumble’s Surf Infusion like I did this time; it has moisturizing oils in it so it not only gives that beach effect to my ends but it also moisturizes them, which is nice after all the heat styling. And it has just enough sea salt in it to not be too drying.
A lot of people also like to add a mousse or some other volumizing product before they begin rough drying, but my personal experience has been that applying stylers after drying my hair is the most effective. I get plenty of volume with a dry texture spray, but if you have success with a product applied to wet hair, by all means go for it.
The nice thing about this style is that it tends to hold up pretty well the next day. You can always go back over sections with the curling iron again, too. And dry texture spray also functions as a dry shampoo; that stuff is seriously the gift that keeps on giving and is by far my favorite hair innovation of the past five years.
Let me know if you try this or these products, and tag me in your pictures if you do! xo, MR
