It’s been way too long since I’ve done someone’s makeup for a special occasion; my last real client was before our move out here! The only thing that’s come close is when I had the pleasure of doing a trial run for a beautiful girl attending her senior prom here in Illinois, but her plans fell through at the last minute. So, since July of last year, it’s really just been me tending to my own face (which begets way too many selfies, let me tell ya).
So you can imagine my excitement when my friend Meg, whom I’d gotten to know through church, asked me to help her with both makeup and hair! I admit I was a little nervous because it had been so long, but I was too excited to work with someone again to let the nerves bother me. Meg was attending a benefit event for the Rehabilitation Institute of Chicago, and the cocktail attire dress code provided the perfect excuse to play around.
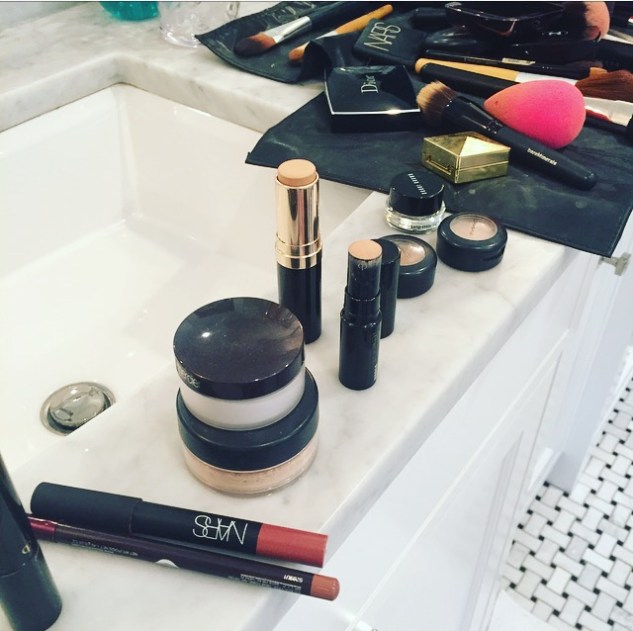
I prepped Meg’s skin with Glossier’s Super Bounce serum, which perhaps turned out to be her favorite product we used that day. Luckily, even though I’d brought my own kit with me, Meg had an amazing arsenal of her own with plenty of great stuff to choose from. We primed her skin with Laura Mercier Radiance Foundation Primer, and then I used a Beauty Blender to evenly apply Bobbi Brown’s Skin Foundation Stick in Beige all over. After a dusting of BareMineral Original Foundation in Light to set it, I used Meg’s two Cle de Peau concealers to the undereye area as well as around the nose and lips. If I can name one area on the face that always gets overlooked when it comes to concealer, it’s the nose area. The skin around your nostrils and at the bottom of your nose almost always suffers from discoloration; a good concealer on these spots has a real lifting and brightening effect. To set the undereye concealer, I used Laura Mercier’s Secret Brightening Powder.
For Meg’s eyes, I stuck with some of my most trusted friends- MAC eyeshadows in Shroom and Cork, and my Dior 5-Couleurs Eyeshadow palette in Earth Reflection. I used the two brown shades in the Dior palette, along with the pearly-white one for the brow bone and inner corners of the eyes. The hardest part of makeup for me, to this very day, is properly blending multiple eyeshadows. I really try to get a look at the eyes from all angles and in both natural and artificial light; I tried to take my time getting this just right because unblended eyeshadow is truly painful to behold (and here’s a tip- shimmery shadows are much more forgiving than matte ones when it comes to blending). I lined Meg’s eyes with my BFF- Christian Siriano for Victoria’s Secret eyeshadow in Royal- and I don’t know what I’ll do when it finally runs out because I’ve yet to find anything quite like it. For lashes, we used multiple layers of Meg’s Bobbi Brown Eye Opening Mascara.

I did a bit of contouring with Kat Von D’s Shade and Light Palette, and used Chanel’s blush in In Love for cheeks. I added a bit of highlighting using MAC’s Mineralize SkinFinish on the top of the cheekbones, and a touch of a pearly NARS cream shadow to the cupid’s bow.
Finally, for lips, Meg prepped them with MAC’s Prep + Prime. We then used Laura Mercier’s lipliner in Natural Lips topped with NARS Velvet Satin Lip Pencil in Bahama- this is the perfect dusty brick-rose with just enough color to be a “statement lip” without needing to be fire-engine red or something. We had her pack a clear gloss with her along with the pencils, just for extra moisture. To set everything and give the whole look a diffused effect, I dusted Meg’s face all over with Hourglass Ambient Lighting Powder in Mood Light.

As for hair, I’d known for a while that I basically wanted to take inspiration from Ahn Co Tran and go for waves with lived-in texture. This is my favorite look, and frankly, it’s one that I know I can replicate fairly well on others. Meg has a midlength bob so I knew this texture would be perfect for her cut.
I used my tried-and-true technique of wrapping one-inch sections of hair around a 1.25-inch curling iron, without using the clamp and always leaving the ends out. If you try this, try to wrap sections loosely so you don’t get a wave or curl that is too tight. As I progressed through her hair (and I did it in three layers, working from the bottom up), I’d separate any waves that were too big or tight and finish with a generous mist of Bumble and Bumble’s Dryspun Texture Finish- better than Oribe! I also sprayed Living Proof’s Instant Texture Mist into my hands and worked it into Meg’s hair, too; the Texture Mist provides bouncy hold and sort of acts like a spray-gel, but better.

I kept laughing because Meg kept saying how I understand “the bend”- no one wants their hair truly curled these days, we all just want it to have that awesome “bend” that looks chic and lived in! It’s the best!
One adorable Majè jumpsuit later and Meg was ready!

I had such an awesome time playing around with this sweet mama- she looked amazing and I was so happy with how much she enjoyed the whole process! I can tell you that it’s so much more fun with the client is interested and curious about what you’re doing, from the skin prep to the final touches. And I was truly happy to finally lend someone a beautifying hand on the North Shore- it’s about time! xo, MR
