If you know me, you know I’m a huge fan of trends. I always look forward to what’s coming out next season, and I’m the first one to jump aboard the bandwagon when everyone starts wearing their hair a certain way (hellooooo, ombre for life). And I love it! Trends are a fun way to keep my look dynamic, and I find myself trying things I wouldn’t normally try once something pops up on the trend radar.
However, when it comes to the beauty trends I’ve seen floating around Instagram these days, I’m not as keen. You’ve heard me say these things before- Kardashian-style contouring, so-called strobing (which is just a trend word for highlighting, which has been around forever), exaggerated lipliner, and the bright red cream blush that is suddenly being applied to everyone’s undereye area because it apparently cancels out green undertones … why? I will admit that all of these tricks can be exciting when it comes to the transformative power of makeup, but it’s become popular to go through these complex makeup routines for everyday life. The Kardashian-Jenner women look fully made up and one hundred percent camera ready every single day, and by sharing all of this with their followers, they have caused millions of other women to aspire for the same.
However, this is not a very realistic thing for most folks to aspire to. Wearing the kind of makeup each day that is meant for HD cameras is not only a lot of look for many people, but it is also difficult to put into practice. It can be time consuming and expensive to apply a full routine of makeup each day like what we see on Instagram, and many would find it uncomfortable to wear that much to work or just out running errands.
So what might a full (keep in mind, full) makeup routine look like for the more average person? One that still ups your typical makeup game, but doesn’t require any red undereye concealer or even false lashes? We can get to all of that, but let’s start with something basic. It is presumptuous of me to believe that I have any answers, but here’s my stab at it:
- Start by prepping your skin. Got a good moisturizer? Slather it on. Or a sunscreen? Serum? Whatever it is, put it on to get your skin moist and ready to receive product.
- .Take either your liquid or powder foundation and use a brush (fluffy or foundation, depending on whether you’re using liquid or powder) to apply a light layer. Be certain that there is no line of demarcation on your jawline. In other words, blend, blend, blend so there is no visible line where the makeup begins or ends. Check your hairline, the smaller areas around lips, and your nose!
- Use an eyebrow pencil no more than two shades darker than your natural brows to lightly sketch in any gaps or anywhere that you’d like more definition. Use a brow brush to brush them up, and then use a brow gel to set them.
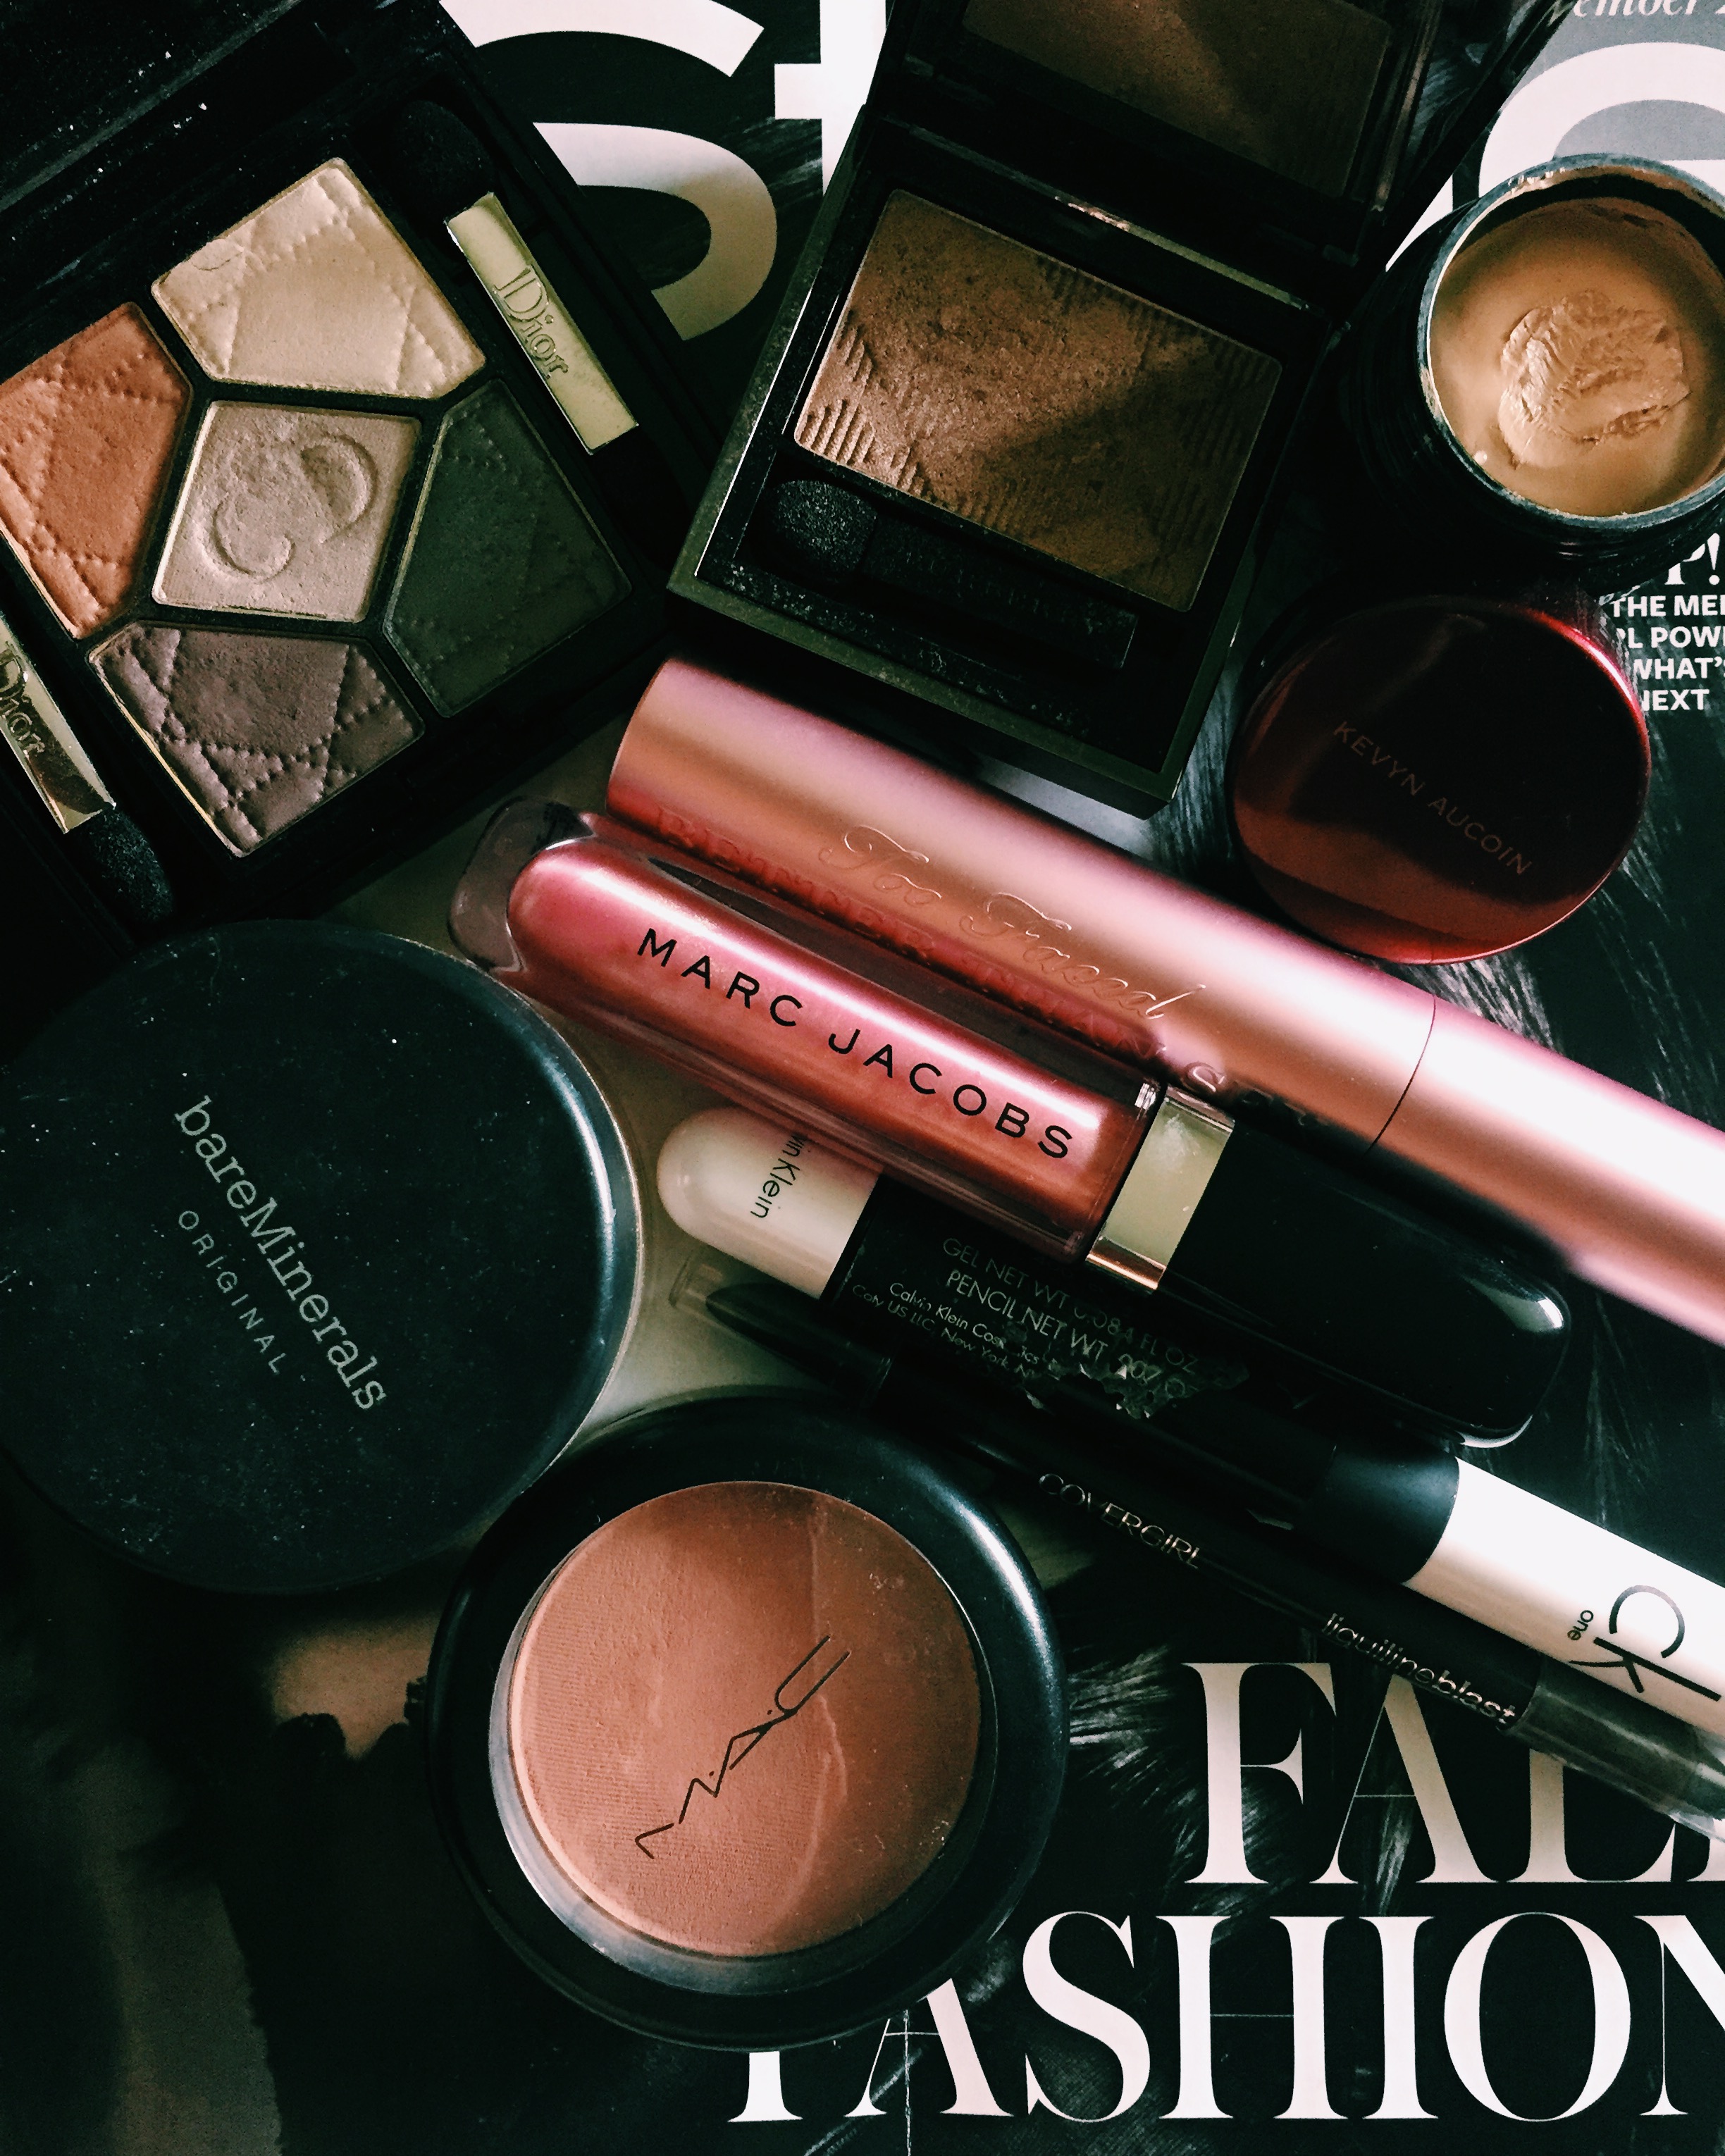
- Take a blush or powder that’s just a shade or two darker than your skintone and, using a blush brush, make light, consistent strokes just beneath your cheekbones (and I used MAC’s blush in Buff, pictured below). This will create some light definition. I typically like to limit my contouring to this. You can also use bronzer for this step. Just be sure to blend well.
- Next, apply a cream concealer to the couple darkened spots on your face such as the undereye area and beneath your nostrils. I like NARS Creamy Radiance Concealer, Kevyn Aucoin’s Sensual Skin Enhancer, and Yves Saint Laurent’s Touche Eclat, which all work as both concealers and highlighters.
- Here’s where I add a bit of highlighting- Along with the darkened places of your face, apply small dots of concealer to areas where light hits your face naturally. See my picture below for a reference. I’ve actually mimicked Chrissy Teigen’s methods here and I’ve found that these little spots work nicely. I also added some around the lips.
- Then, use a concealer brush (or your finger, which will work) to blend in the concealer. Try your best to find natural light when blending so you can see clearly. It is hard to blend accurately and thoroughly in a poorly-lit bathroom. Your face should appear to have some nice dimension and should appear highlighted, even glowing. Obviously, the picture below is pre-blending.
 6. To add some extra shimmer (or “champagne pop” as some have called it), take any shimmery highlighter such as MAC’s Mineralize SkinFinish in Soft And Gentle and apply it to the apples of your cheeks, your forehead, and a bit on your chin.
7. For your eyes, I like to choose a neutral but flattering eyeshadow such as Burberry’s Pale Barley and blend it all over my lids, stopping at the browbone. For just a little extra drama, I line my eyes with a darker, matte shadow like the bottom-left shade you see in the Dior Grege palette you see below. Line the upper lid, line the lower lid. Add some brown eyeliner to the waterline. I’ve used the same CoverGirl one for a couple years.
8. The one thing I’ll go overboard on is mascara. I take as much time as I want on this. However many coats, however many different kinds. Everything else is so neutral and light that I like to add that small dose of glamour with a ton of thick lashes.
9. And finally, for lips, I just add a gloss! No lipstick, no liner, just gloss. Pick any flattering gloss you like. I’ve been using Marc Jacobs Enamoured Hi-Shine Lip Lacquer in Love Buzz.
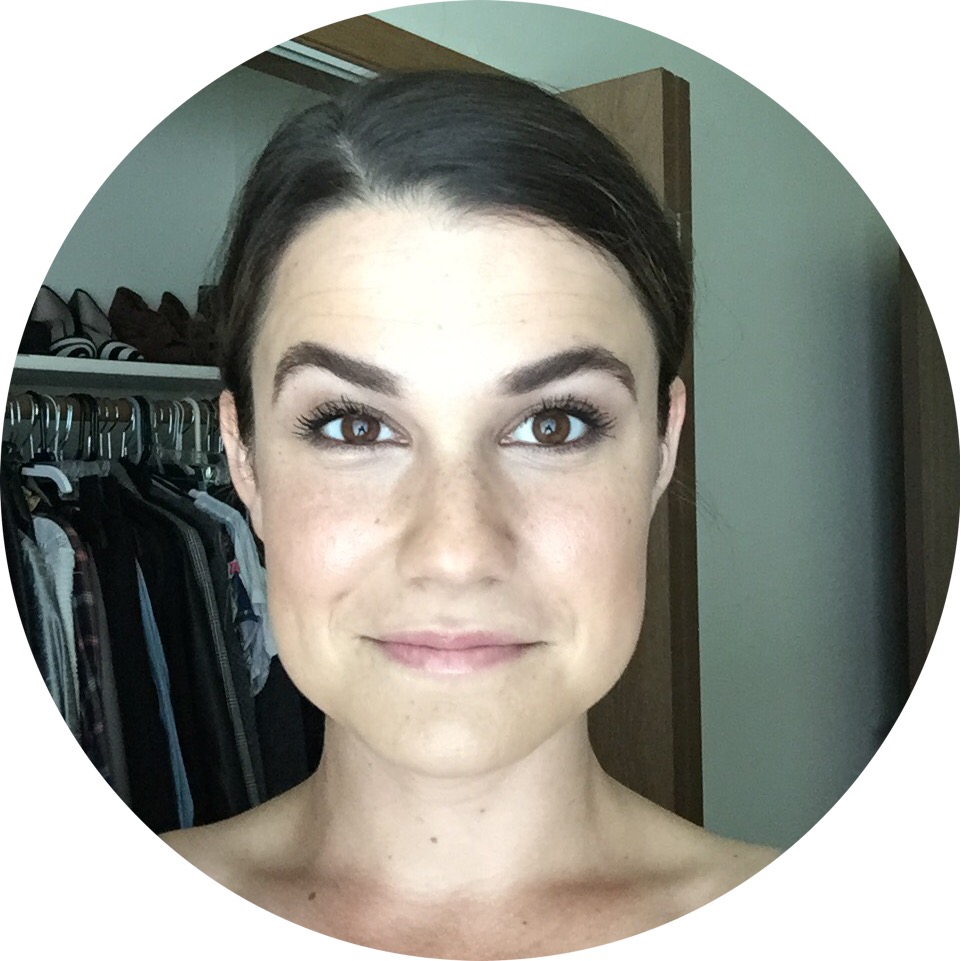
Give all this a shot. There’s no filter here, so this is how it turned out in natural light in front of a window. I’d say the steps that make this a little more difficult for those who’d call themselves “beginners” are those involving the concealer as highlighter. You can always skip those steps and just start with concealing the darkened areas or problems spots (like zits), and add some shimmery highlighting powder to your cheeks. Play around with it, and let me know what works. xo, MR

Pingback: Brow Game Strong | thebrightblush