Vid Tutorial: Beauty Blender For Beginners

So, what difference can a twenty-dollar sponge honestly make with foundation application?

In my honest opinion, a lot.

For a long time the BeautyBlender sounded very gimmicky to me.  I mean, couldn’t I just go buy the pink knock-off sponges at CVS?  Well, you can, but the BeautyBlender is soft, silky, washable, and reusable.  It’s meant to handle a lot of work, and it is not the same as your typical drugstore sponge.  The results when it comes to foundation application are true to the hype, and I believe this tool works better than foundation brushes!  I purchased one perhaps a month ago and I have to tell you that I haven’t picked up a foundation brush since.

So, here’s a quick how-to on applying foundation with a BeautyBlender (along with a bonus how-to on Glossier’s BoyBrow).  Enjoy!  xo, MR

What I Brought Home From My Vacation

My Christmas vacation this year consisted of a trip back to southern California, where the sun shined unbelievably for the full nine days that we were there.  What a beautiful time it was.  I had flapjacks with Dad, went on a traditional shopping excursion with Mom, laughed my butt off with my family as we celebrated Christmas, stood basking in the warmth of Laguna Beach, saw so many friends that I love, managed to squeeze in quality time with a few of them, and just had an all-around great time being around people and places that I’ve missed.

But of course, me being me, I couldn’t resist listing what I got out of this trip that pertains to the nature of this blog.  Namely, what beauty experiences did I walk away with during my time in the Golden state?

A new appreciation for flying

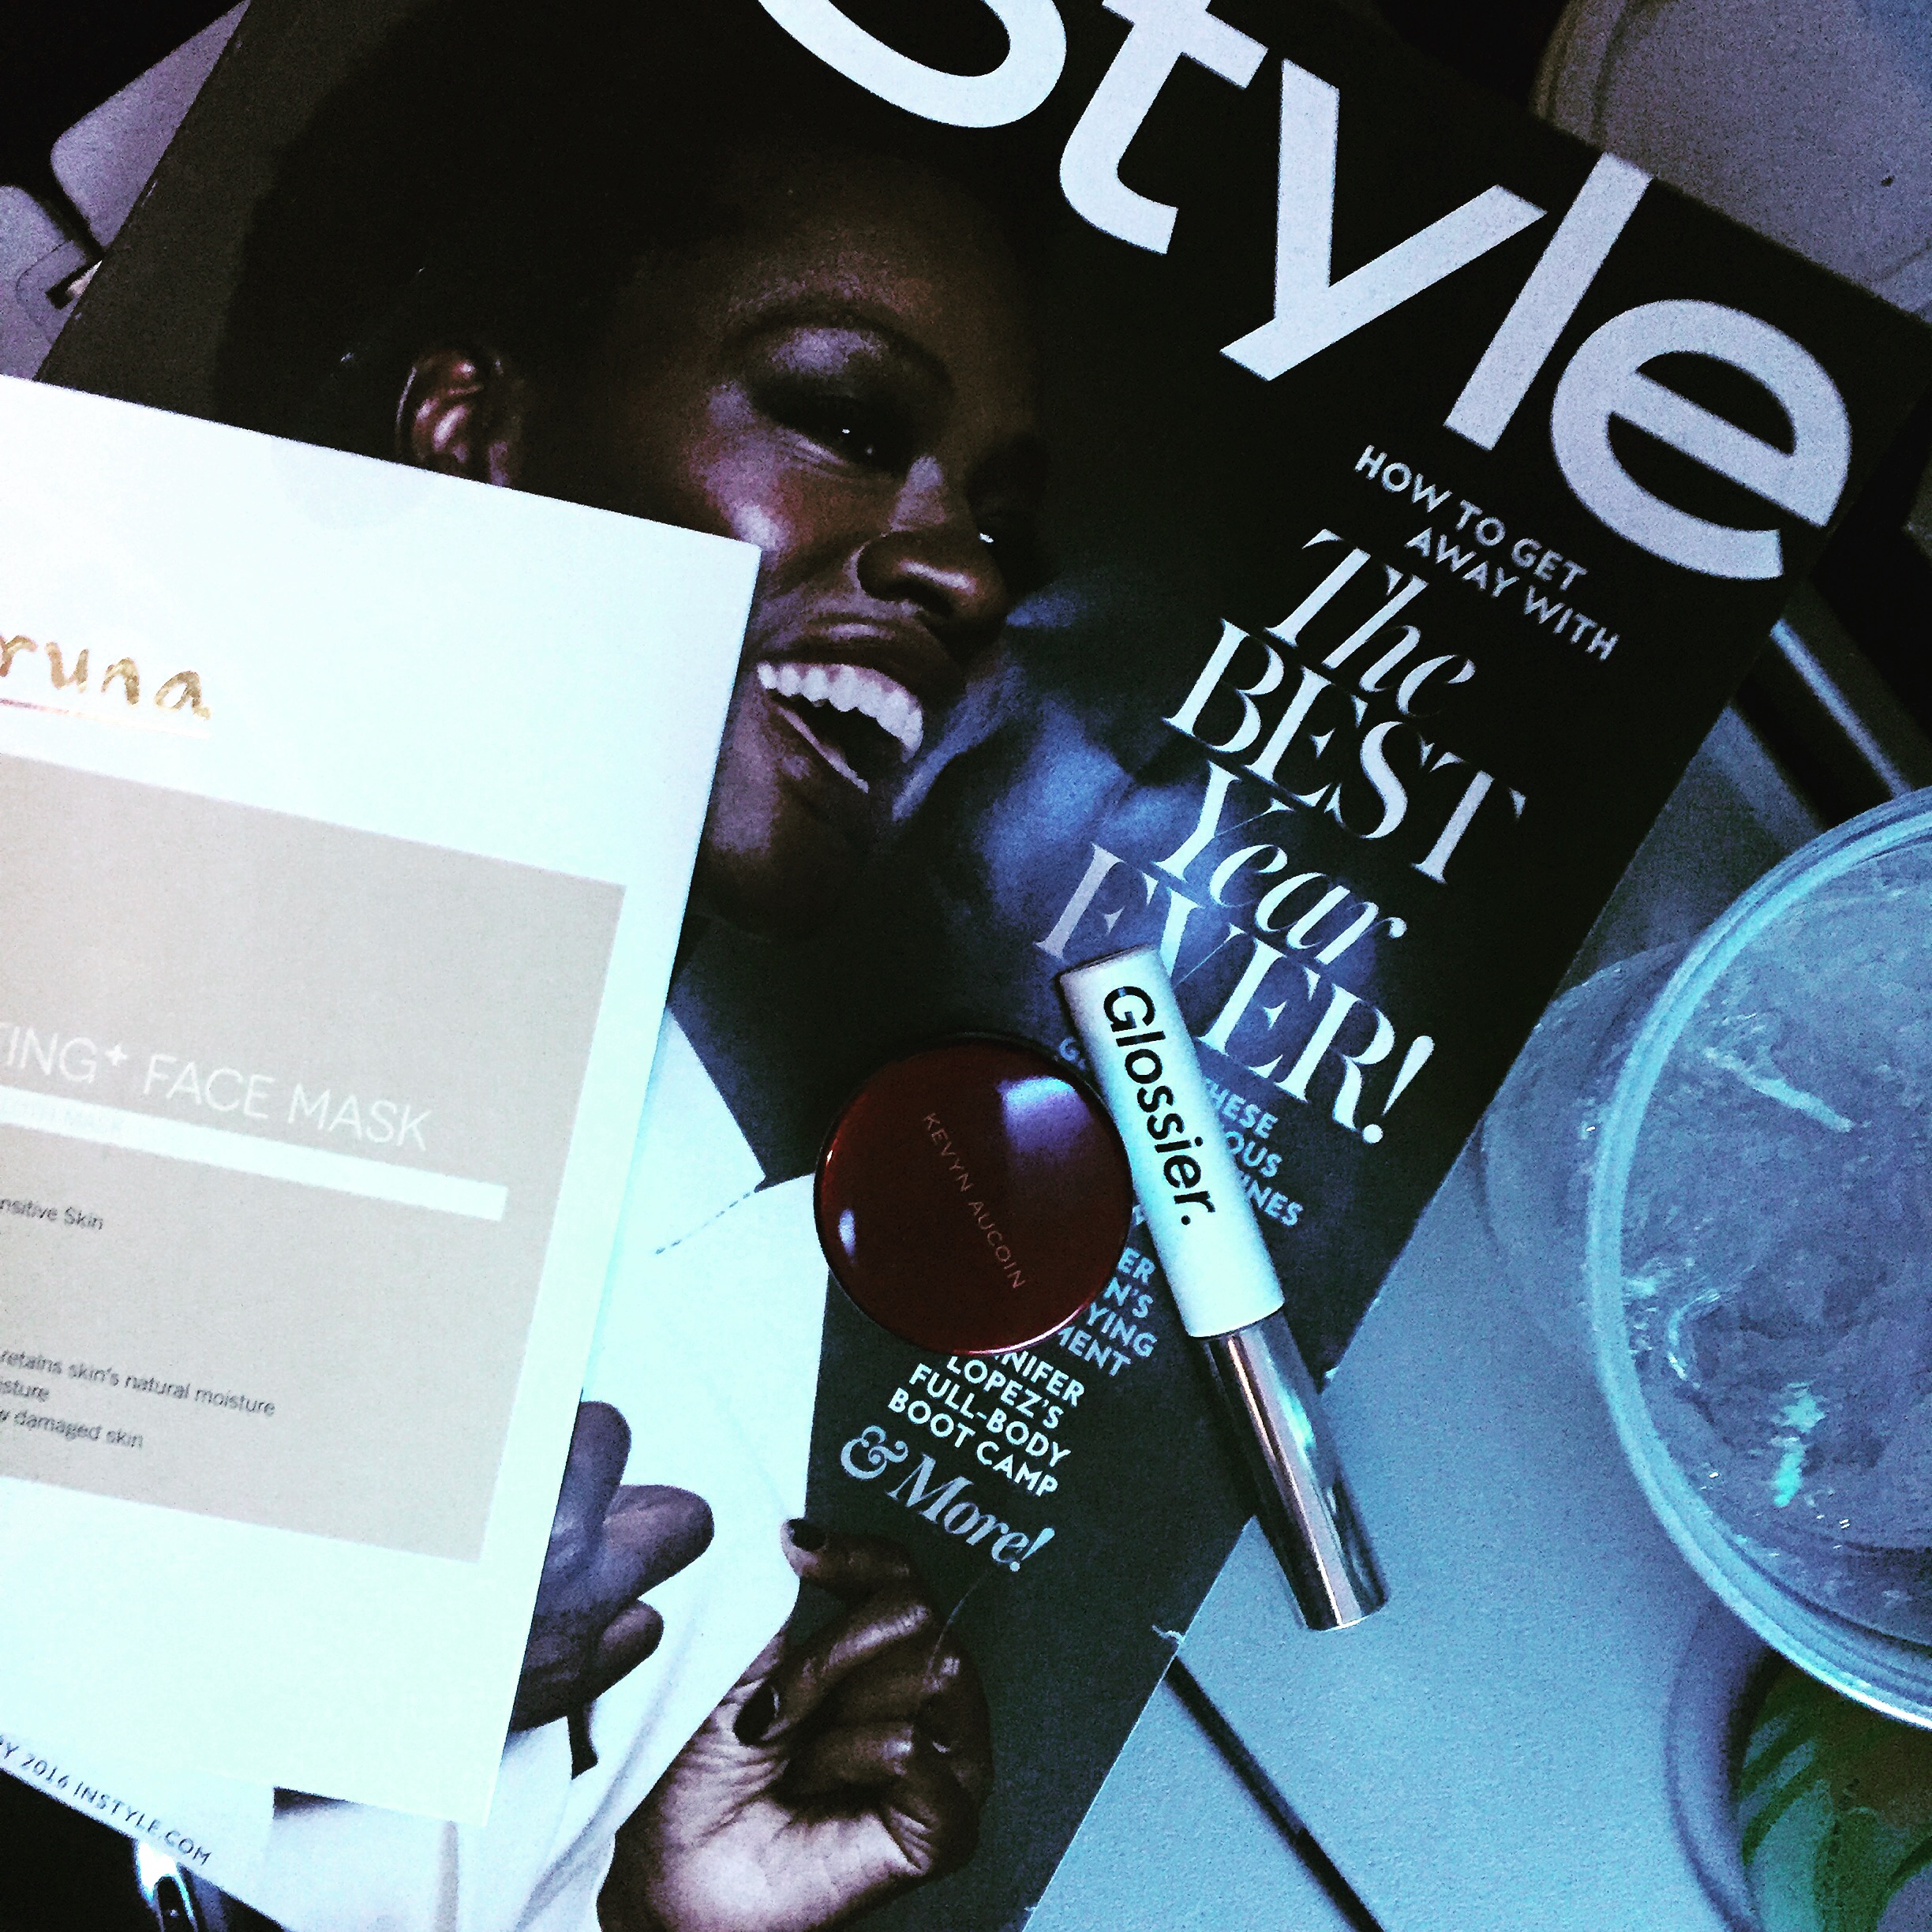
This trip involved my first flying experience in over four years.  While the flight into California was ridiculously turbulent (as in the-captain-issued-a-preemptive-apology kind of tubulent), the flight back was actually quite pleasant.  I enjoyed a couple issues of Elle and InStyle, a Korean serum mask, and a very small glass of Bailey’s just for fun.

IMG_1374

Adding the tiniest bit of luxury to my flight almost made it feel like a borderline chic experience.  Hey, when you’re flying second class and your knees are touching the awkward, hungover twenty-one-year-old’s knees next to you, you kinda have to make it work, even if it means that twenty-one-year-old almost jumping out of his chair at the sight of you wearing a creepy Hannibal mask next to him.

A serious Sephora haul

Now that you’ve heard me complain a couple times about how dry my skin is over here, you’ll be glad to know that my mom-in-law came through with two products that I’m so excited for, and a couple that I picked up myself thanks to a generous gift card from my mom.

IMG_1439

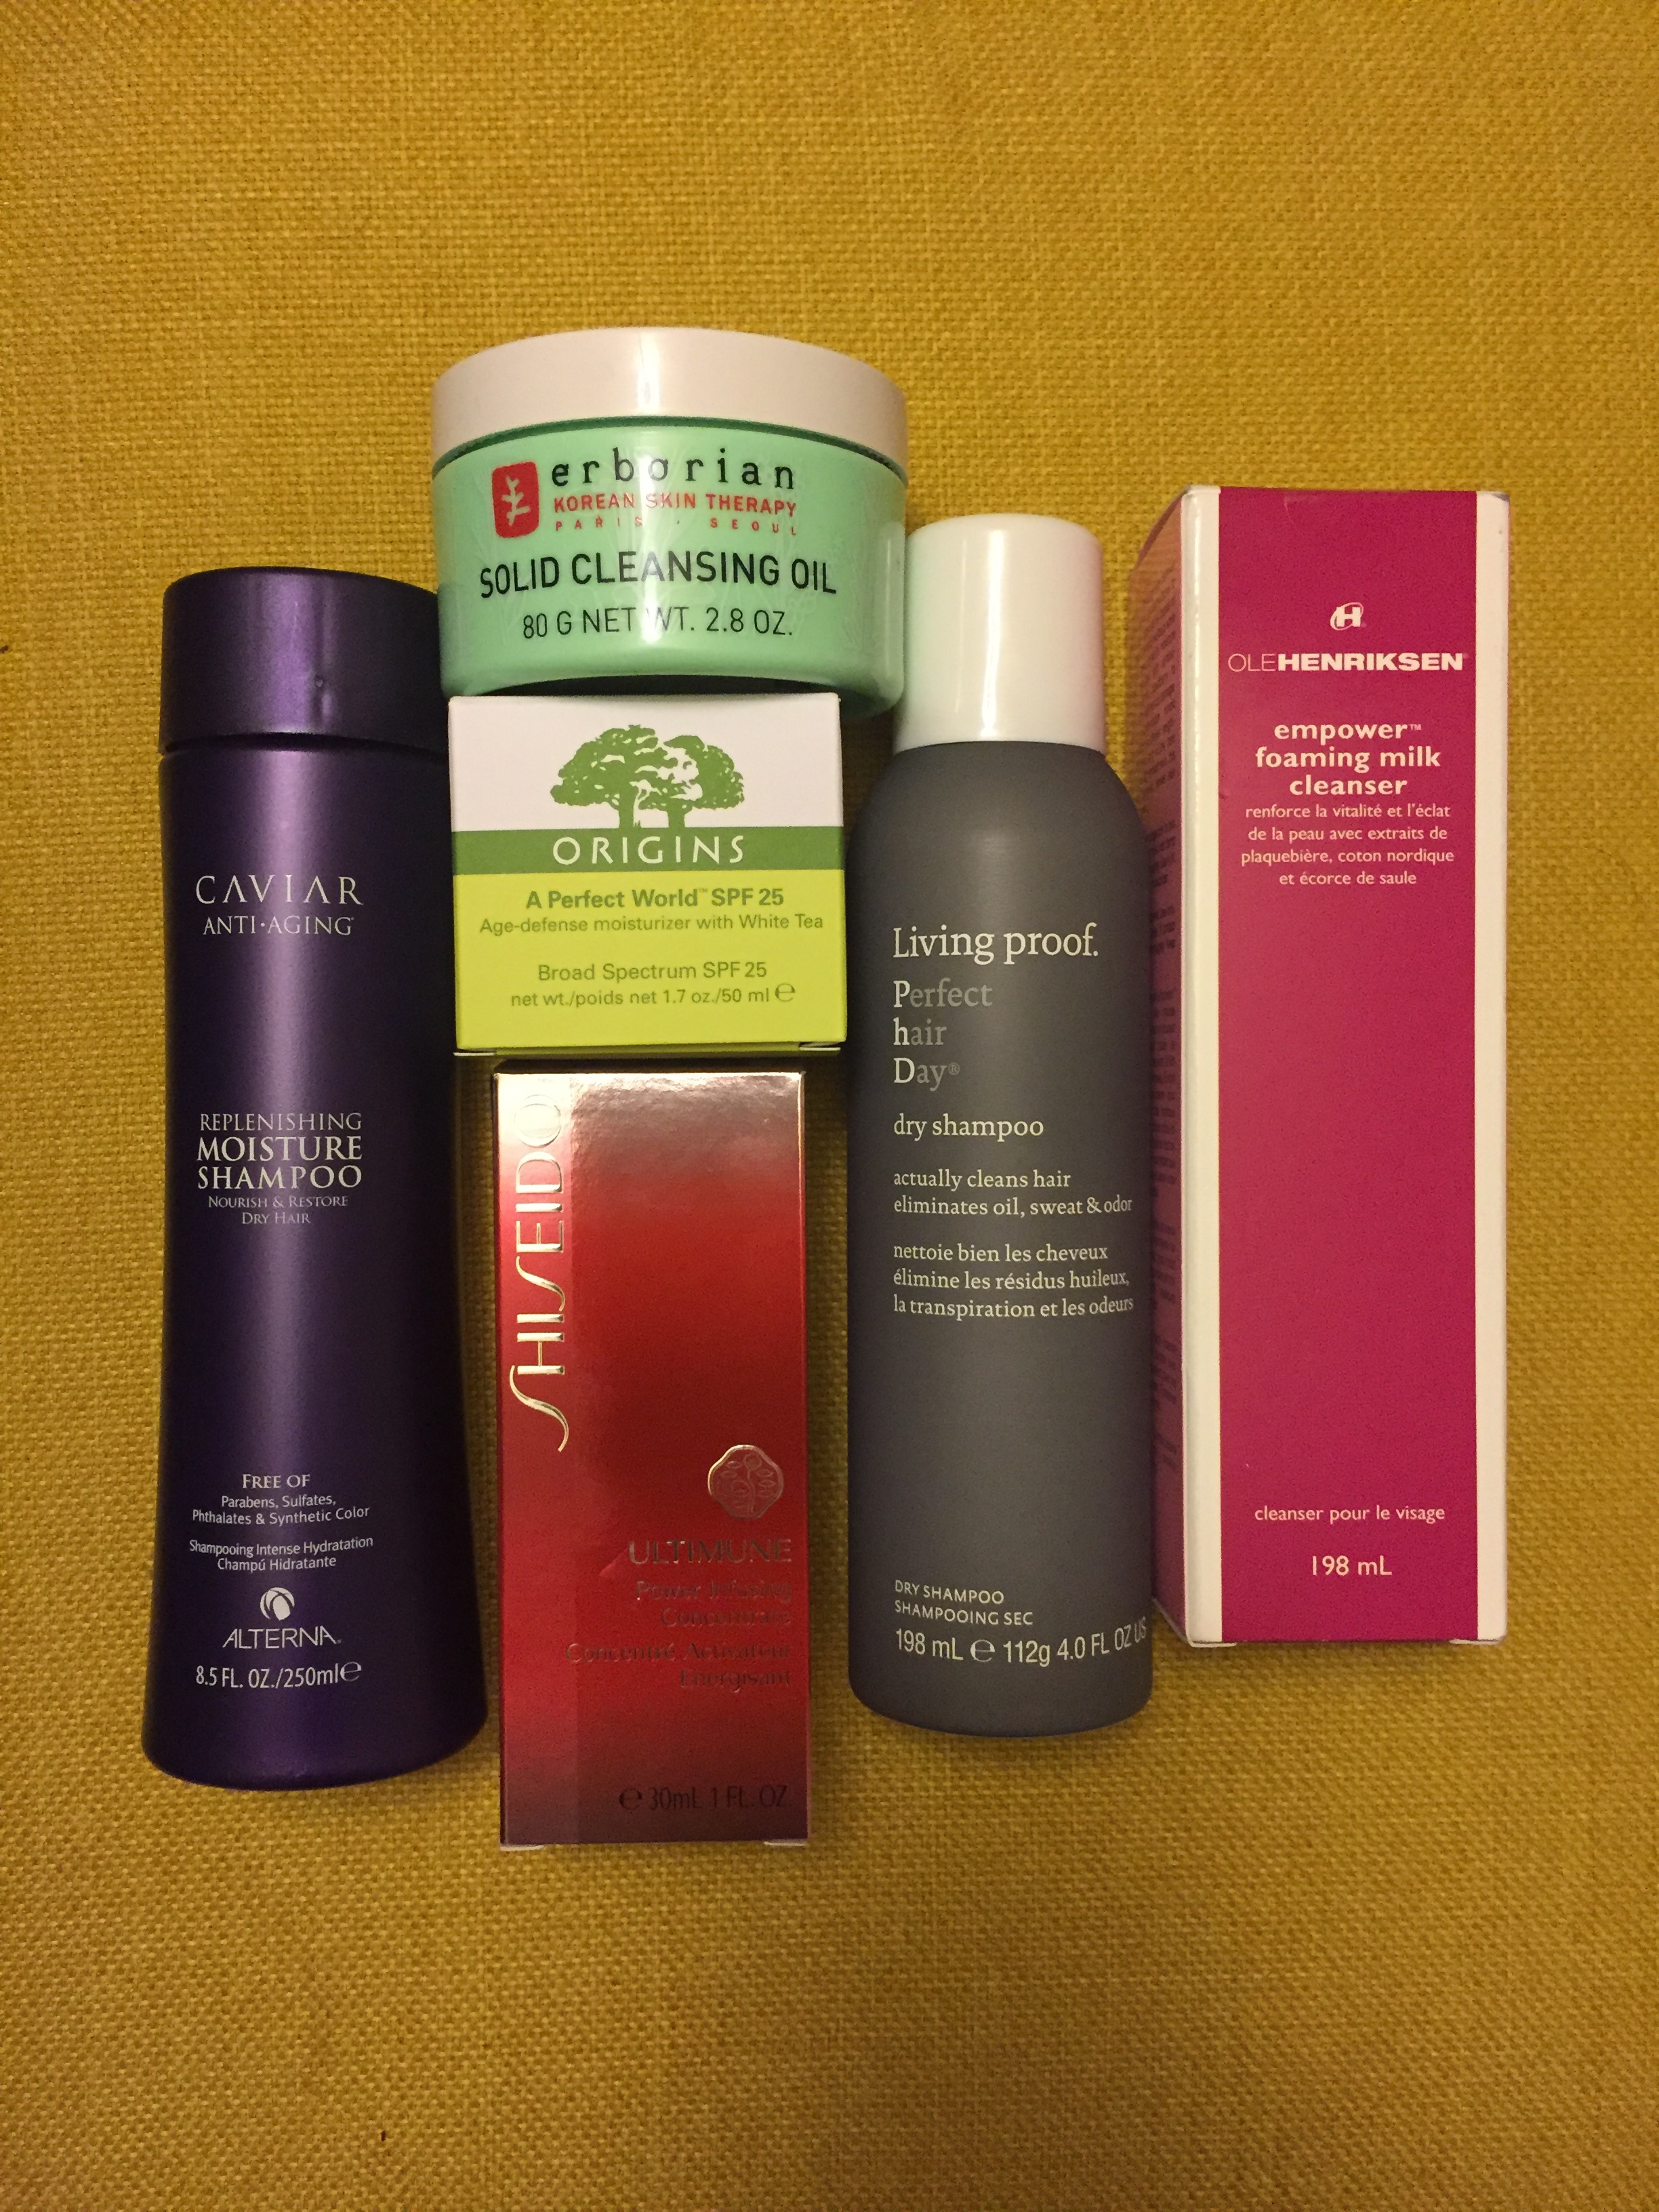
I’d wanted to try an oil cleanser since my skin starting drying out over here, and my mom-in-law came through for me with this one.  I received Erborian’s Solid Oil Cleanser as one of my gifts.  Out of curiosity, I took home a sample of this from Sephora and it is some dreamy stuff, let me tell you.  It smells so fresh and relaxing, with a spa-like green tea fragrance.  The unique consistency is that of a thick, stiff goop, but take a minute or two to really massage it into your dry skin.  It is delicious.

According to the Korean double-cleanse method, you’re then supposed to follow an oil cleanser with a foaming cleanser (though I’m sure the oil cleanser is probably enough for most people).  I’ll be using Ole Henriksen’s Empower Foaming Milk Cleanser (once I finish what I currently have), which also smells relaxing and calming.  I’ve been so into finding scents that lift my spirits lately.  Doing little things like enjoying a smell, or listening to soothing sounds, treating yourself to a coffee, or doing a relaxing yoga session in your apartment are things I used to right off as sad, temporary attempts at trying to avoid reality and ignore life’s troubles.  Now I realize they’re just ways of enjoying your freaking life.  And another small way of enjoying life- dry shampoo.  The highly reputable Living Proof formula was also a Christmas gift, and it’s especially helpful for managing the new hairy addition to my forehead I came home with (see below).

My own Sephora picks include Alterna’s Caviar Replenishing Moisture Shampoo, Shiseido Ultimate Power Infusing Concentrate, and Origins A Perfect World SPF25 Age-Defense moisturizer.  I’ve used all three of these items before and I enjoy each of them.  After running out of my fourth bottle of Rahua shampoo, I’m choosing to give it a break and focus on intense moisture throughout the winter with my hair, especially as I grow it out.  The Alterna is great for that.  Concerning the Shiseido, I have said that I like Caudalie’s Vinosource serum better and I believe I still do.  However, Caudalie is good for intense moisture but it doesn’t necessarily help with other areas of concern like spots, etc.  The Shiseido is a little more geared toward all areas, so I’m going to see how well it multitasks.  And the Origins moisturizer is a nice one that I’ve been using for a while now.  I’ll stick with it.

My only bummer was having my new bottle of Fresh Seaberry Restorative Body Cream, a gift from my sis-in-law, detained by TSA because the bottle was too big.  Poop.  Once again Mom saves the day by sticking around just long enough at the airport for my husband to run it back to her so she can ship it out.

A super-dark manicure

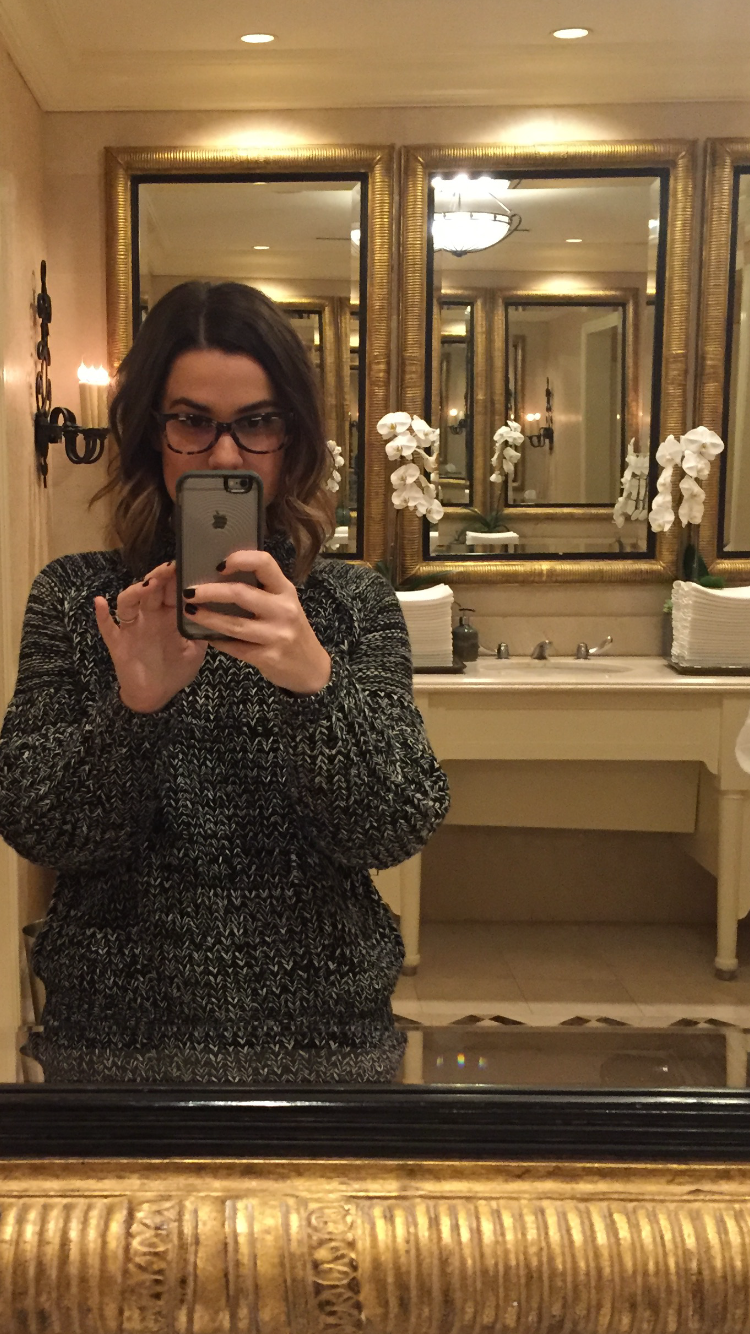
Ever since growing my nails back, man, I am addicted to painting them.  I do darks, nudes, or a true red.  For my manicure that I got with my mama (thanks, Mom!!), I chose OPI’s Lincoln Park After Dark, a cult fave, for New Year’s and to go with my mostly basic wardrobe that I’d packed for the trip.  It’s a really deep purple that is barely distinguishable from black, but that’s why I like it.  Once you catch the color in the right light, you see the eggplant hue shining through.  It can work as an interesting accessory (and yes, I consider painted nails an accessory).

So, here’s the best shot I got of them, which also happens to be the best shot I got of an extremely fancy-pants bathroom at the Montage in Laguna.  Two for one.
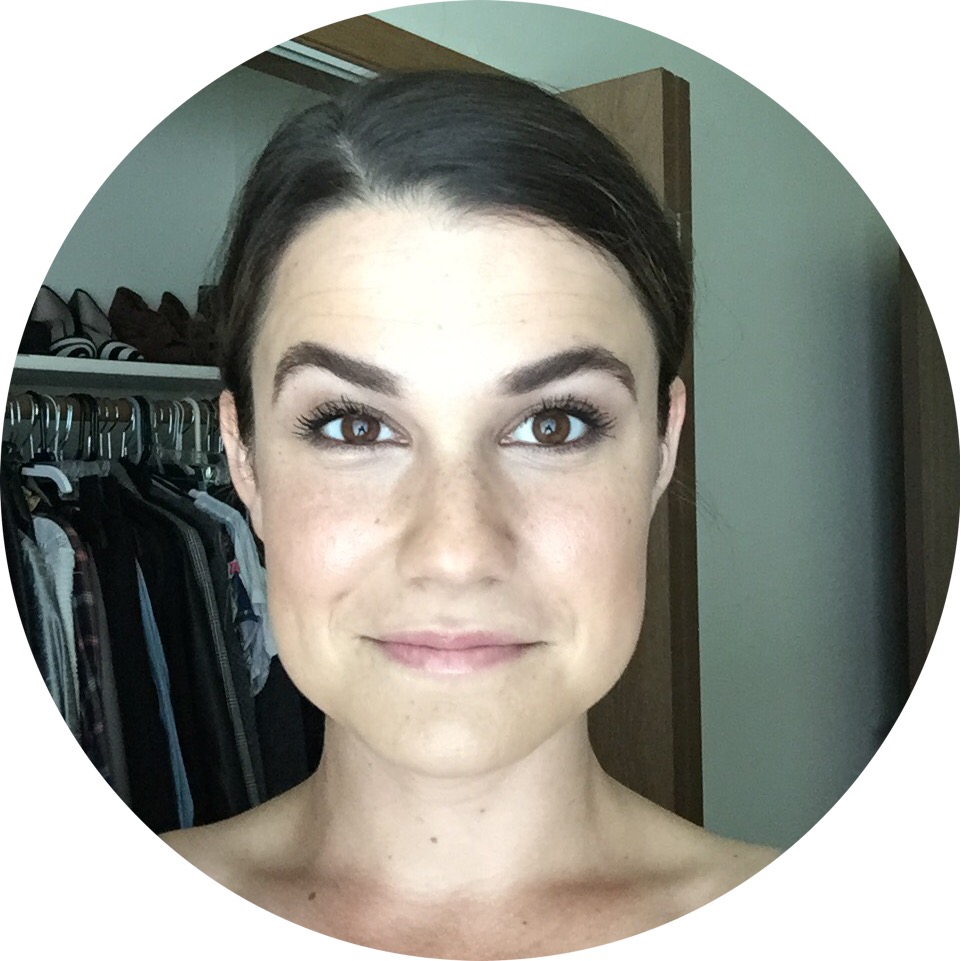
IMG_1440

BANGS

Because I knew I’d be able to book an appointment with Justin at Salon 9, I had to take the opportunity.  I’ve been rocking a mid-length, rather grown out ombre’d lob since summer, and I figured I could go for a couple small-ish changes.  We darkened things a bit and went for a richer brunette while still leaving some shimmering highlights within the length.  The real addition here though, is the new arrival of bangs.  Whew.  I had forgotten what a commitment they are, but I really want to make them work this time.  I mean, really.  I want long hair down to my chest like I had before, but now with long bangs.  I want bangs to be part of my integral look for a while, so I’m in it for the long haul.  And don’t make fun of my robe or slight-smeared eyeliner here.  I’m wearing MAC’s kohl liner in Smolder, which I consider my Jack Sparrow liner because it always smears and you just have to roll with it.  A pirate’s life for me.

IMG_1437

What this has meant so far is styling them every day, somehow.  I can’t get away with just throwing everything up in a bun and leaving the bangs scraggly and bent out of shape after getting out of bed; they have to be styled.  I mean, there’s looking French, and then there’s looking hungover-French.  Bangs cowlicked up past your forehead can put you in hungover-French territory, so styling them is a necessity.  Sometimes this means just tweaking with a flat-iron, sometimes it means wetting and washing them and starting all over.  It’s very difficult not to fuss with them throughout the day, but you have to remember that their shape doesn’t need to be perfect.  Gone are the days when bangs needed to be precisely uniform and round brushed, so the look still isn’t as high-maintenance as it might’ve been, say, seven years ago.  You can get away with a much more laissez-faire feel now, but you still need to make sure things look cohesive.

IMG_1416

For me personally, I think bangs are a good exercise in self-maintenance and forming a consistent routine of trying.  I very much look forward to the care and keeping of them.  Cheers to caring more in 2016!  xo, MR

Brow Game Strong

Back in high school, I noticed this one girl, who had always been very pretty, suddenly beginning to look much more adult than the rest of us.  I couldn’t put my finger on what had happened.  And it wasn’t anything owed to physical development of the body; it was something different about her face.  Her hair was perhaps getting lighter, but that just didn’t account for all of it.  It was something in the expressiveness of her face that had suddenly become more mature and couldn’t be found on my own face.

I remember when I realized that it was the fact that she was now penciling in and defining her eyebrows that had caused this noticeable change.  When I think about it, she didn’t really have standout eyebrows before (light blonde), and now they were squared off with a very angular arch, colored in with a chestnut-blonde pencil that was a couple shades darker than her hair color.  It gave a very harsh effect in hindsight that I would never attempt to repeat, but I think that was the first time when I realized how powerful eyebrows can be.  They are very easy to ignore, but it is truly amazing how much of a beautiful impact they can have on your look when you pay just a little attention to them (or, well, the right kind of attention I guess).

My mom began urging me to leave me own eyebrows alone around the same time I noticed this other girl’s.  At that point, the trend was still to pluck them nearly out of existence and/or replace them with dark, harsh pencil lines, and it had been so all through the preceding decade.  Natural brows circa 2003 were considered sort of weird.  If you manage to find a picture of the Spice Girls, Drew Barrymore back in her younger years, and even Angelina Jolie around the same time, you’ll see that eyebrows were not recognized as the crowning glory of the face as many now see them.  Women like Brooke Shields and Jennifer Connelly (who I am eternally and forever obsessed with) were considered sort of fringe-y and almost avant-garde for letting their brows remain strong and full (and not always in the best way).  I remember my mom referencing Brooke Shields when encouraging me to leave my eyebrows alone, and though I didn’t yet have a grid for “different” being a good thing at that point, I listened to her.  I thought maybe my eyebrows could be something special.

I probably did not pluck a single hair from my brows (save for the little rogues that tried to make their way out into No Man’s Land) until I was 22 or 23.  At that point I began seeing the benefits of plucking one or two hairs that had come down just a tad too far; this defined the shape of my brow and prevented them from becoming a chaotic mess.  I also began using my first product to fill them in a bit more and brush them into place- Anastasia’s Tinted Brow Gel in Espresso.  I used this on my wedding day.  I hadn’t thought of really paying much attention to enhance my eyebrows before all this.

And then it happened- Cara Delevingne happened.  One model, over the course of perhaps just one year, exploded within the fashion world and seemed to singlehandedly make full, bold brows cool again.  Brushing them up, and yes, making them darker but without sacrificing their texture (as in you want the hairs to be visible and not colored over) became acceptable rules to play by.  And suddenly, everyone who had ever plucked their brows to death in the 90’s and 2000’s was at a disadvantage.  I, however, rejoiced!  And seemingly overnight, bold, statement-making brows were everywhere in the celebrity world- Camilla Belle, Lilly Collins, Keira Knightley, Diane Kruger, Megan Fox, and a million more.  Finally- a beauty trend that I really, really felt like I could relate to, and one that didn’t demand alterations of what was natural.  And it was finally okay to look like Joan Crawford again.

So what do I currently use?  If a wily hair ever manages to make itself just a bit too present, I reach for my Tweeezerman tweezers (and they are truly the most precise) and yank that sucker outta my life.  But not too much!  I limit myself to probably three choice hairs that don’t belong.  If I start hunting for more than that, I fear that things may get out of hand.  So in short- extremely limited plucking, like maybe once every 1-2 months.  I like how brows can almost take on a more masculine quality when you let them be.  For the most part, I try to let them do their thing.

Processed with VSCOcam with g3 preset

As for daily grooming, I often find that I won’t touch or brush my hair in the mornings, but I will tend to my brows.  At the very least, combing them up into place happens with a brow brush or a clear gel.  I once found myself using a plastic fork to brush them up at work when I failed to bring anything with me.  My most regularly used product is the CK One Color Brow Pencil and Gel Duo in Crafty Raven.  The tapered pencil is easy to use and the spooly brush with gel is a cinch.  I’m on my third one of these currently.

When I have a couple extra minutes, I use Brett Brow’s Duo Shade Pencil in Medium Brunette.  I use the darker side on the inside half of my brows, carefully filling in the inner corners but without squaring them off (which scares me and looks a bit angry).  It’s important that my brows look shaded, soft, and natural, and not as if they were stenciled in.  It’s important to me that I still be able to see the individual hairs.  I probably use the most pencil around the arch area, which is just off from the center of my eye.  I then take the lighter shade and sketch a little more into the arch and then out (creating that so-called “ombre’d” brow effect).  I then use Brett Brow’s Arch Control Gel that comes with a dry blender brush.  I use the dry brush to blend in any sketched lines that are too harsh and visible, and then finally the gel to brush the brows up and in place, carefully tapering them off at the ends.  This particular gel leaves brows shiny, which I love.

If I’m really going the extra mile, I’ll take a creamy highlighter like the NYX Wonder Pencil and draw just a couple tiny dots beneath my brows, blending them in thoroughly.  This gives a lifting effect, and it highlights the brow bone in a very flattering way that opens up the eye area overall.  The highlighter-concealers that I discussed in this previous post are also excellent to use for this technique.

And that’s about as crazy as it gets.  I have never had my brows waxed, and their shape isn’t immaculate like much of what we see these days on Instagram, but I appreciate the low maintenance.  I’d rather put money or time into a hair appointment or a nice skincare item, but I’ve had a couple friends with very high maintenance eyebrows that they love to invest in and treat beautifully.  I remember InStyle magazine once describing high maintenance brows (think Camilla Belle status, possibly in need of frequent waxing appointments) as the “Celine luggage of brows”, referring to them as impeccably tailored and requiring the best of care.  I love that idea, but I myself have not been quite that blessed.  I guess the grass is always greener.

My next brow venture will probably involve attempting to trim my brow hairs (myself).  Anyone do this currently?  I’m curious to hear your experiences.  Peace, love, and brows for now!  xo, MR

Average Makeup For Average People!

If you know me, you know I’m a huge fan of trends.  I always look forward to what’s coming out next season, and I’m the first one to jump aboard the bandwagon when everyone starts wearing their hair a certain way (hellooooo, ombre for life).  And I love it!  Trends are a fun way to keep my look dynamic, and I find myself trying things I wouldn’t normally try once something pops up on the trend radar.

However, when it comes to the beauty trends I’ve seen floating around Instagram these days, I’m not as keen. You’ve heard me say these things before- Kardashian-style contouring, so-called strobing (which is just a trend word for highlighting, which has been around forever), exaggerated lipliner, and the bright red cream blush that is suddenly being applied to everyone’s undereye area because it apparently cancels out green undertones … why?  I will admit that all of these tricks can be exciting when it comes to the transformative power of makeup, but it’s become popular to go through these complex makeup routines for everyday life.  The Kardashian-Jenner women look fully made up and one hundred percent camera ready every single day, and by sharing all of this with their followers, they have caused millions of other women to aspire for the same.

However, this is not a very realistic thing for most folks to aspire to.  Wearing the kind of makeup each day that is meant for HD cameras is not only a lot of look for many people, but it is also difficult to put into practice.  It can be time consuming and expensive to apply a full routine of makeup each day like what we see on Instagram, and many would find it uncomfortable to wear that much to work or just out running errands.

So what might a full (keep in mind, full) makeup routine look like for the more average person?  One that still ups your typical makeup game, but doesn’t require any red undereye concealer or even false lashes?  We can get to all of that, but let’s start with something basic.  It is presumptuous of me to believe that I have any answers, but here’s my stab at it:

  1.  Start by prepping your skin.  Got a good moisturizer?  Slather it on.  Or a sunscreen?  Serum?  Whatever it is, put it on to get your skin moist and ready to receive product.
  2. .Take either your liquid or powder foundation and use a brush (fluffy or foundation, depending on whether you’re using liquid or powder) to apply a light layer.  Be certain that there is no line of demarcation on your jawline.  In other words, blend, blend, blend so there is no visible line where the makeup begins or ends.  Check your hairline, the smaller areas around lips, and your nose!
  3. Use an eyebrow pencil no more than two shades darker than your natural brows to lightly sketch in any gaps or anywhere that you’d like more definition.  Use a brow brush to brush them up, and then use a brow gel to set them.
  4. Take a blush or powder that’s just a shade or two darker than your skintone and, using a blush brush, make light, consistent strokes just beneath your cheekbones (and I used MAC’s blush in Buff, pictured below).  This will create some light definition.  I typically like to limit my contouring to this.  You can also use bronzer for this step.  Just be sure to blend well.
  5. Next, apply a cream concealer to the couple darkened spots on your face such as the undereye area and beneath your nostrils.  I like NARS Creamy Radiance Concealer, Kevyn Aucoin’s Sensual Skin Enhancer, and Yves Saint Laurent’s Touche Eclat, which all work as both concealers and highlighters.
    1. Here’s where I add a bit of highlighting- Along with the darkened places of your face, apply small dots of concealer to areas where light hits your face naturally.  See my picture below for a reference.  I’ve actually mimicked Chrissy Teigen’s methods here and I’ve found that these little spots work nicely.  I also added some around the lips.
    2. Then, use a concealer brush (or your finger, which will work) to blend in the concealer.  Try your best to find natural light when blending so you can see clearly.  It is hard to blend accurately and thoroughly in a poorly-lit bathroom.  Your face should appear to have some nice dimension and should appear highlighted, even glowing.  Obviously, the picture below is pre-blending.

IMG_08646.  To add some extra shimmer (or “champagne pop” as some have called it), take any shimmery highlighter such as MAC’s Mineralize SkinFinish in Soft And Gentle and apply it to the apples of your cheeks, your forehead, and a bit on your chin.

7.  For your eyes, I like to choose a neutral but flattering eyeshadow such as Burberry’s Pale Barley and blend it all over my lids, stopping at the browbone.  For just a little extra drama, I line my eyes with a darker, matte shadow like the bottom-left shade you see in the Dior Grege palette you see below.  Line the upper lid, line the lower lid.  Add some brown eyeliner to the waterline.  I’ve used the same CoverGirl one for a couple years.

Processed with VSCOcam with c1 preset

8.  The one thing I’ll go overboard on is mascara.  I take as much time as I want on this.  However many coats, however many different kinds.  Everything else is so neutral and light that I like to add that small dose of glamour with a ton of thick lashes.

9.  And finally, for lips, I just add a gloss!  No lipstick, no liner, just gloss.  Pick any flattering gloss you like.  I’ve been using Marc Jacobs Enamoured Hi-Shine Lip Lacquer in Love Buzz.

IMG_0876

Give all this a shot.  There’s no filter here, so this is how it turned out in natural light in front of a window.  I’d say the steps that make this a little more difficult for those who’d call themselves “beginners” are those involving the concealer as highlighter.  You can always skip those steps and just start with concealing the darkened areas or problems spots (like zits), and add some shimmery highlighting powder to your cheeks.  Play around with it, and let me know what works.  xo, MR