What I’m Using: October 2019

One of the losses you experience moving back to the West Coast from the Midwest is the deeply-felt absence of a true autumn. There isn’t much color change unless you head to the mountains, and the weather doesn’t give you that crisp brightness you long for while being basic and sipping a hot toddy.

However, I’ve been pleasantly surprised during this first fall week here. The weather has shifted, and perhaps it’s because I’m by the sea, but both my husband and I have walked out the door the past couple days only to head back in to grab a second layer. There’s even been rain. The jarring couple weeks skyrocketing back into the 90-degree weather are sure to come (and the dreaded Santa Ana winds with them- haven’t felt those in years) but in the meantime, I’m thinking positively and adjusting my routine with it. Here’s what I’m using this month.

IMG_8602.jpeg

The early AM luxury- Kiehl’s Creamy Eye Treatment with Avocado

I’m on the whole “eye cream is a scam” team, mostly because I believe if a cream is good for your face then it’s good for your eye area. However, I can’t deny that eye cream is such a yummy, simple ritual for my early mornings that I’ve so come to appreciate. Tapping just the tiniest bit of this creamy treatment on my lower lids and the area below it feels soothing and luxurious at 6AM. This particular cream is very brightening and adds a touch of sparkle to your inner eye area, too.

The anti-aging powerhouse – Drunk Elephant A-Passioni Retinol Cream

A couple years ago I purchased a retinol oil from The Ordinary. I figured I’d give up my so-so Neutrogena retinol serum for the acclaimed budget brand and start my true foray into vitamin A territory. However, I managed to choose the oil with the least amount of active ingredient in it and saw little to no results (other than just being a nice, hydrating face oil- squalane is not a bad choice). And over the summer, it managed to spill open during the move. Oh well, it was only about eight dollars including shipping anyhow. It was time to move on to bigger and better things.

And so, with a Sephora gift card in hand along with the VIB sale, I pulled the trigger on something not budget-friendly- Drunk Elephant’s A-Passioni Retinol Cream. This was an upgrade to say the least. The deal with this product is to use it along with your simplest skincare routine (no additional actives- it’s intense and you may feel the tingles!). The weird thing about it is the next day, my skin just looks nice.- nothing crazy But then, about a day after that, I will either have a couple whiteheads or I’ll peel a bit. But just trust the process. And then the day after that, my skin looks really, really nice. Like airbrushed nice. I’m using it once a week and the payoff is seriously worth the dime.

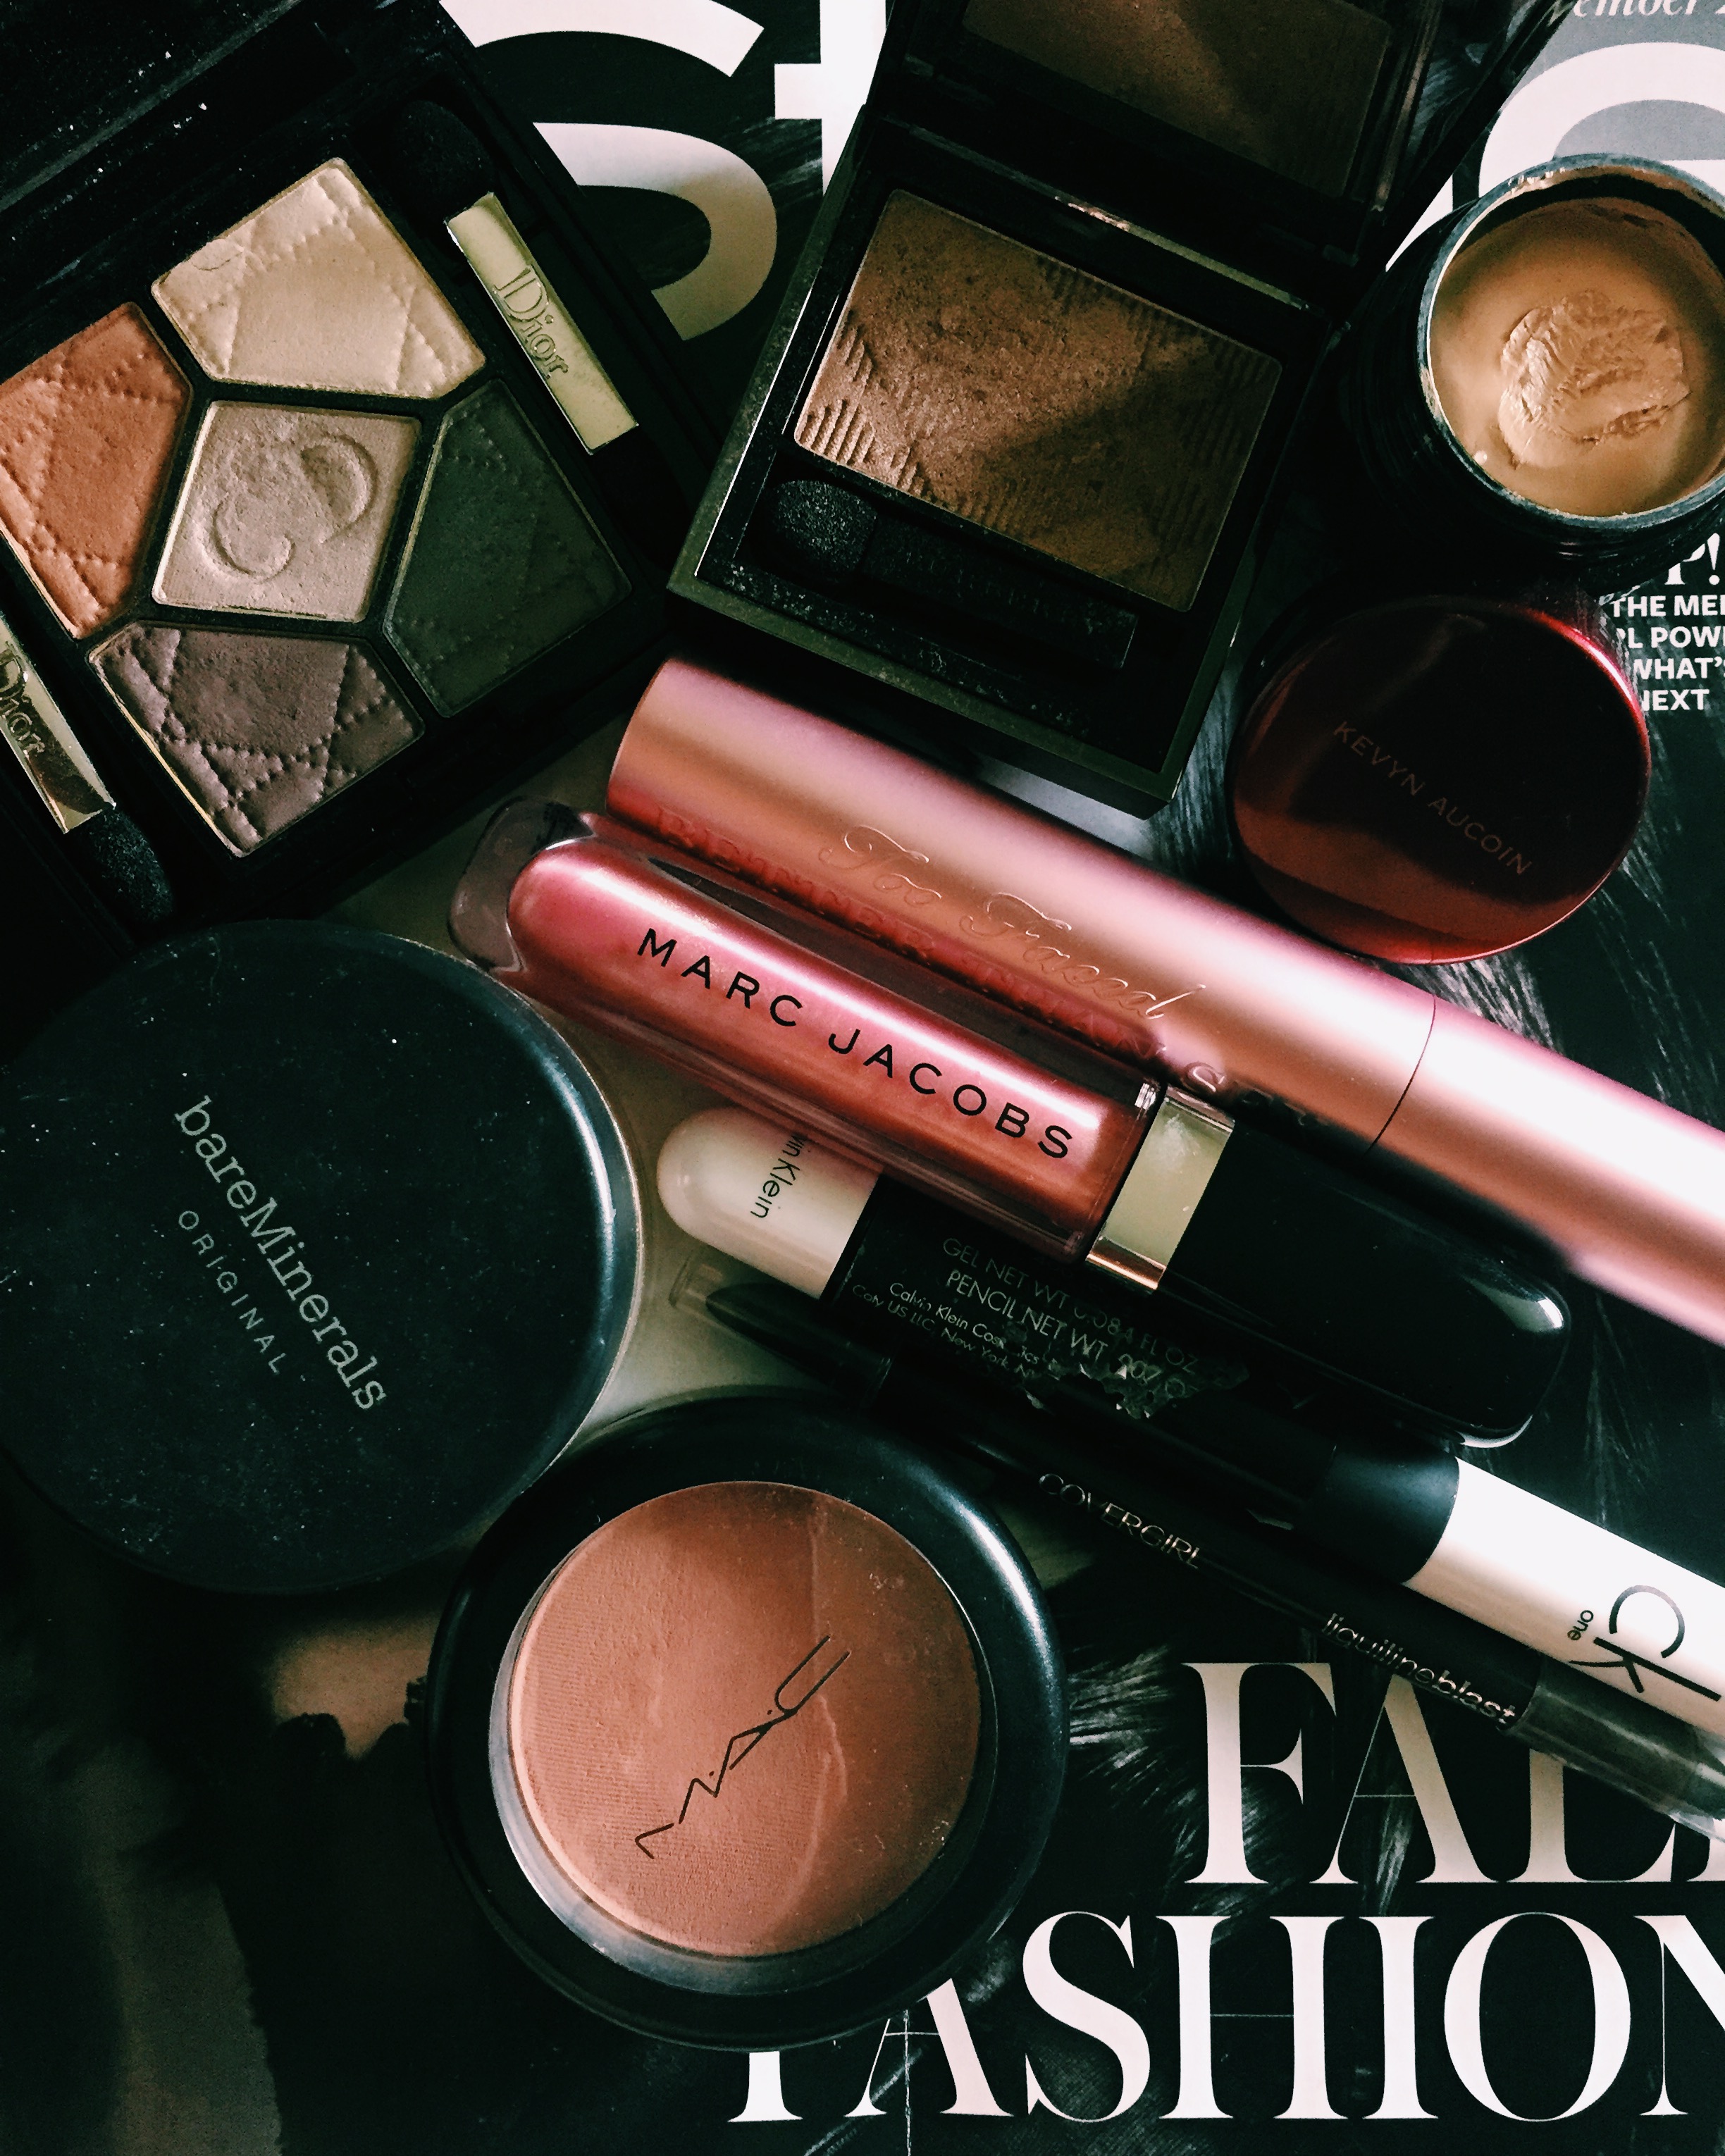
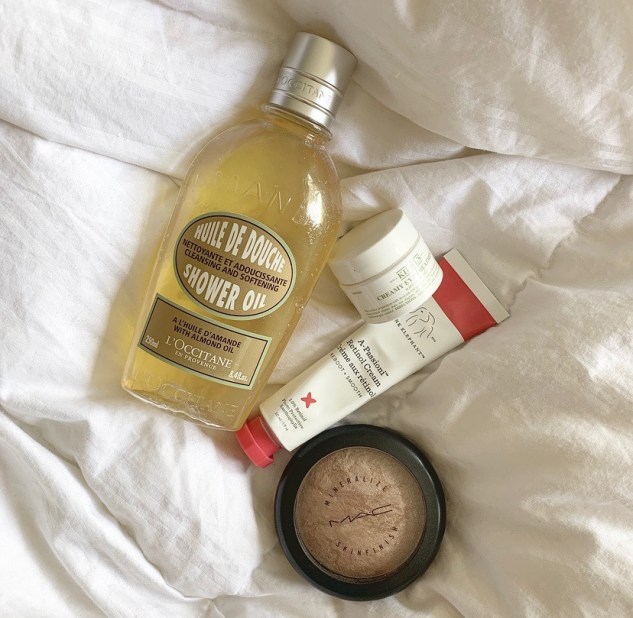
The classic – MAC Mineralize Skinfinish Highlight Powder in Soft and Gentle

Highlighting is one of those things that jumped to the front of the line about five years ago, with lines like Fenty, Becca, and any name imaginable trying to outdo one another with their most over-the-top versions they can dream up. Liquid, cream, powder, megawatt glitter finish or just a touch of shine … there’s a highlighter for everyone including your grandma. But while I do love glitter and shimmer and have always stopped to swatch Bobbi Brown’s Shimmer Brick at Sephora, some highlighters are a little too extra for me (see Fenty Diamond Bomb). MAC’s Skinfinish powder is just enough to give your cheekbones that noticeable pop without making you look like a disco ball- it’s a classic, in-the-middle amount of highlight. I “windshield wiper” it on with my highlighter brush just on the top of my cheekbones.

The I’m-bored-with-Dove option – L’Occitane Almond Shower Oil

There are two shower cleansers that I use: the original Dove Deep Moisture and Glossier Body Hero. I can only tolerate the most moisturizing of body washes because it turns out that I am driest person on Earth, particularly my legs. My legs are scaly and sand paper-y, so much so that they make that sand paper-y noise when they rub together. It’s pretty much all Dove all the time, and about every three months I’ll throw in a round of Body Hero because it makes your boring showers feel expensive. This past summer, however, I used L’Occitane’s almond oil while staying at someone else’s home and knew I’d have to buy it for myself. It has the same oil-to-milk texture that the Glossier has but it with a rich, sweeter fragrance. I would probably only go for two bottles a year because it’s not a fragrance I’d enjoy all year long, but it’s a great switch-up for the season.

Bonus! The absolute best fall candle on a budget – Trader Joe’s Honeycrisp Apple scented candle

While I’m all about celebrating the transition into autumn, I’m not keen on super-sweet candles (i.e. pumpkin pie). I still want fall to feel fresh and clean, and overly saccharine fragrances give me a sort of closed-in feel that doesn’t relax me. My solution to this problem is the Trader Joe’s Honeycrisp Apple candle. It’s a paraben-free soy blend that costs just four dollars. And it is the most unbelievably crisp, perfect apple scent that doesn’t cross out of sophisticated territory into cloying Country Apple (if you know, you know). For the price, I blaze through about one of these a week starting on the first day of fall, completely guilt-free.

What I’m Using: An AM Routine

The last four years in Illinois really enabled me to think through the little things that make me, me. What do I like and don’t like? What kind of routine am I currently capable of, and what kind of routine do I wish I could have? How healthy am I, and what could make me healthier? It was all sort of laid bare before me. We’ve only been back in California for two months but we’ve jumped head-first into an extremely busy season. And my routines have shifted dramatically, partly out of obligation and partly because I think I’m just healthier. My job has me starting work at 7AM, but I see a lot of faces each day and need to look more presentable than not. I also have a kitten that practically tries to murder me once the lights turn on and she gets in the room, so once I’m up, I am up. Whereas in years past a 5:50am alarm would’ve been a real struggle, I’m managing to make something out of the half hour of consciousness I’ve got before driving to work.

If I’m lucky, I’ve gotten up early enough to quickly rinse. I’m a night shower-er but if I can throw myself under some water in the AM I feel my absolute best and most awake. It’s not necessary to me, but going to work feeling totally clean is the best. It’s the ultimate feeling of preparedness. I’ll cleanse with Glossier Milky Jelly and spritz on a Lush toner while my face is still wet. I wait for that to dry a bit and pat on some of Fresh Black Tea Kombucha Essence- very expensive but I hate to say it, I think it’s making the biggest long-term difference in my skin. I’ll wait for makeup after that and not add any more skincare layers. Otherwise my face feels too moist and I feel like I’m sweating.

Makeup is fast in the morning. I put a bit of NARS Creamy Radiant concealer on my undereyes and on the inner corners of my eyes, along the sides of the bridge of my nose where it’s always really dark. I call those the little “caves” of your eyes- they get so dark and that’s the key spot to brightening them. I also put some under my nostrils and a tiny bit around my lips where things are discolored. I blend that all out with my fingers and maybe add some BareMinerals Complexion Rescue around the rest of my face. If you like that dewy, glowy look, this is the stuff for you. Or instead I just blend out some Glossier Stretch concealer where it’s needed. I go by the KatieJane Hughes method and treat that stuff like a solid tinted moisturizer.

IMG_8549.jpeg

Eyeshadow is typically something I skip because I get too ambitious too quickly with it, but if I have two minutes I’ll buff out a couple creamy, sparkly brown shadows with a cream shadow brush. I love Maybelline’s Color Tattoo in Bad to the Bronze mixed with Trish McEvoy’s cream shadow stick in Topaz. They’re really pretty blended out together all around the eye. I’ve also just tried the crystal-infused eyeshadow from Victoria Beckham’s new line in Mink and it’s crazy sparkly and flattering. Basically anything brown or bronze with sparkle works. The mascara that packs the fastest punch is Flower Beauty’s Warrior Princess one. I’ll use CoverGirl Clump Crusher to separate and define a bit, but the Flower one gives all the impact. And I never use eyeliner in the morning. That requires like, three products for it to be perfect.

Blush is either a cooler pink or a warmer shade, which then determines my lip color because we can’t have things clashing too much. NARS Exhibit A gives the most impact with the least amount of product. Anyone else weird about using only the least amount of product possible? I feel like I’m trying not to run out of things but then I end up with makeup that’s three years old and still looks unused. It’s like a weird compulsion of mine.  But anyways, I could pick literally any blush and I’ll be happy with it. My lips usually end up with Glossier Generation G lipstick in Cake or Burt’s Bees Tinted Lip Balm in Hibiscus. I like Charlotte Tilbury’s Matte Revolution lipstick in Very Victoria, too. I prefer lips without much shine for everyday. Gloss is a such a look to me.

A76EB96E-4C39-4E27-8A67-DB7B503D5E9B.JPG

If I have any more time left I’ll add highlight with MAC’s Mineralize powder in Soft and Gentle and maybe some contour with Kat Von D’s Shade and Light palette. I’ve had this angled brush from Sonia Kashuk forever that absolutely perfect for contouring. It’s old and there’s nothing like it.

Oh and almost forgot- eyebrows. If I leave the house without any other makeup on, it’s fine- but my brows are always fixed up. I use Maybelline’s Brow Drama crayon to fill in any sparse spots and set them with Glossier Boy Brow. I don’t pluck them, I don’t do anything to them other that.

Beyond all this I just add perfume. That and eyebrows are the essentials for me. There’s something humanizing about perfume; it makes you feel like you have a personality and perspective. Everyone says things like, “That’s a mood” or “That’s a vibe” but my mind always wants to say, “That’s a perspective.” I have several different roller balls so I just sort of choose what suits me that day, but nothing too powerful. I’m finishing off My Burberry Black right now and just bought a bottle of Hugo Boss The Scent Private Accord. It’s sweet but very warm.

If you’re interested in seeing the full look put together, my July post features a selfie. But be aware- my hair is also done, which really doesn’t happen on weekday mornings. That would require something like a 5:15am alarm, and we all know that’ll never happen. xo, MR

My Best Lily-Rose Depp Impression

Glamour isn’t a magazine I usually pick up, but when I noticed that Gal Gadot was slated to be on their April 2016 cover, I figured I’d snag a copy considering it was Wonder Woman’s first American cover and she kicks major Super-butt.  However, a fun little surprise waited for me inside that had me squealing: a step-by-step-how-to-get-the-makeup-look-feature thingy.

Yes, I live for step-by-step-how-to-get-the-makeup-look-feature thingies.  Even though the “products used” typically aren’t accurate and they usually feature some celebrity with perfect skin, I still love coming across features like this because I like the challenge of recreating the makeup on myself (even if their skintone is completely different; it’s still fun to try and at least emulate the color portions).  Sometimes these written “tutorials” turn out great and involve some kind of makeup trick that I keep stashed away in my brain forever; other times, it’s just discouraging seeing how your face in general cat-eyeliner doesn’t turn out quite as stunning as Margot Robbie’s, even after adhering to the instructions.

So, last Friday night, I opened up to page 97 of the April issue of Glamour (on stands now, btw) and got to work recreating this smokey purplish-bluish eye as seen on Lily-Rose Depp.  And yes, that’s Johnny Depp’s kid.  Makes you feel a bit old, don’t it?


For my foundation, I used Lancome’s Teint Idole Ultra Longwear Foundation Stick in Bisque W (which I’m pretty sure stands for “warm”).  I stuck with the advice of placing four dots of foundation on the face and then spackling it out with a BeautyBlender, but I ended up needing more like six or dots.  I think this method would work seamlessly with liquid foundation and mine was a stick, so I’ll try liquid next time.  Stick foundation just doesn’t blend outward as easily as a liquid.

For my cheeks I used MAC’s Mineralize Skinfinish powder in Soft And Gentle, and their Mineralize Powder Blush in Warm Soul.  I would’ve preferred a matte blush for this look, but I discovered that I don’t have a matte blush that I’d consider “peachy nude” as suggested by the makeup artist.  I do love Warm Soul in general, though.  It’s great for a casual daytime look, though I’m not sure if it would complement every skin tone so I’d sample it first.

It’s when I got to the eyes that I really parted ways with the article’s recommendations.  I used a NARS eyeshadow duo that I’ve had for some time, called Marie-Gallante.  I thought it matched the product suggestions well, but in the end I wasn’t quite on the money.  I’ve often used Marie-Gallante as a liner, but this time I layered both shadows on thick as suggested.  The result was a lot more pastel than I was hoping for, though the purple still looked nice.  Turns out the blue shade in this duo is deceptive; it’s a lot lighter than it looks and it just isn’t deep or navy enough to create that dark, smokey effect I desired, so I ended up with something that ultimately felt very springtime as opposed to, well, nighttime.  Oh well.  And for my lips I used Lancome’s Color Design Lipstick in Natural Beauty.  That turned out just as I wanted; I love that shade.

IMG_1915

So as you can see, the eyes don’t really match at all but the skin turned out rather nicely!  I need to break into my Urban Decay eyeshadow in Perversion again- it’s a super concentrated, smokey blue-black that probably would’ve worked better for this look overall, minus the purple tones.


Any off-the-beaten-path looks you like to try when going out, or just when you’re feeling bored with your same ole’ black eyeliner?  Teach me your ways!  And I’m really one to talk, anyhow- every time I try to break out of the black smokey eye rut, I find my hand once again reaching my MAC kohl liner.  I’m a creature of habit; what can I say?  xo, MR

When More Is More: Kardashian-Inspired Makeup

I used to think I really loved makeup.  Well, I mean, I do love makeup.  A lot.  I always thought I loved it more than most people.  However, within the past couple years or so, makeup as we know it has changed forever in some radical ways.  And in light of this, I have to say that my love for makeup as we know it now has become more of a journey than a certainty.  Let me provide a little background.

The rise of the Youtube video blogger in the 2000’s transformed the world of makeup through the power of shared knowledge.  Suddenly, everyday women all over the world were able learn and practice difficult and elaborate techniques thanks to thousands of tutorials posted by other everyday women all over the world.  Some video bloggers have reached mega-celebrity status like Michelle Phan and Jaclyn Hill, with their worth now in the millions.  Instagram offered another avenue for sharing makeup knowledge, along with its glow-giving filters and other fancy apps with capabilities of blurring and retouching our complexions.

Then came the variable with the most impact- Kim K and her Kontouring Kingdom.  Suddenly the world of makeup was launched into the stratospheric heights of what once seemed impossible.  Social media took quick notice, and now you can’t scroll through your feed once without noticing a woman showing off that signature Kardashian-Jenner look: contoured cheekbones, a contoured forehead and chin, golden-yellow highlighting thanks to some type of banana powder, shimmery, pearlescent highlighting across the forehead and cheeks, a contoured and highlighted nose, immaculate eyebrows, full, voluminous lips sporting a matte, liquid lipstick, layered eyeshadow with a flawless cut crease, thick, perfectly-drawn winged eyeliner, and dramatic false lashes.  Throw on a couple filters and there isn’t a flaw in sight.  It doesn’t exactly look natural either, but in this new phase of makeup artistry for every woman, more is more.

I’m not consistently drawn to this maximalist kind of makeup as most know; I find myself more inspired by the work of celebrity makeup artists as opposed to what I see on Instagram (with folks like Mario Dedivanovic and Joyce Bonelli excepted).  However, it is fun to think about all the possibilities in your train case after watching a tutorial on the most elaborate smokey eye you’ve ever seen.  Even if something isn’t quite for you, it can still be inspiring.

IMG_1525

And so, I decided to have a little fun last night and just go for more.  And man, did I not feel like myself.  This was no single wash of eyeshadow topped with a bit of kohl liner and mascara like I usually do for a night out or something.  I followed the formulas of multiple Youtube bloggers that I’ve watched and went through every step in what felt like a game of human paint-by-numbers: mattifying primer, liquid foundation, powder, concealer, contouring, banana powder, illuminating powder, blush, shadow primer, layered eyeshadow (four shades), eyeliner, mascara, false lashes, lipliner, and liquid lipstick.  Everything I used is pictured above, except for the false lashes (which were just accent lashes by Ardell).

And none of the following photos have any filter on them.  I’m simply standing in front of a soft lamp for the ones featuring the finished look.

IMG_1524

BAM.  Crazy!  The difference is almost laughable, isn’t it?  It probably would’ve helped to give a bit more of a smile in the photo on the left, but hey, for dramatic purposes we’ll leave it as it is.  Not hiding the bangs under a beanie helps as well, but when it’s -2 outside and you’ve just arrived at work after battling the oppressive elements, you’re probably going to put your bangs in a beanie too.

But it didn’t turn out too bad, did it?!  I have to say that I liked how I looked in most every picture I took, which isn’t typical for me at all.  That is one thing that this kind of makeup can do well- photos are suddenly not so intimidating.  You just have to find your favorite angles that show off the makeup best.

IMG_1517

Also, understand that to many women (and men too, from what I’ve seen on Insta), this is still total amateur hour. I did not take things anywhere near as far as some Youtubers or bloggers take them, and a lot of people would probably still consider this a soft, natural look. I don’t, but it starts to become a matter of relativity.  Many people have had countless hours of practice with Kardashian level, “extreme” makeup, and they can do much, much more than me in terms of talent and technique.  This is just one of my first takes on it.

I’m convinced that the one detail that really takes things to the next level is the highlighting on the nose.  It’s what kind of gives you that ethereal, almost plastic look.  The Kat Von D Shade and Light contouring palette is also key- I really, really like that palette.  I’ve watched several Youtube videos on how to get the most out of it, and it’s amazing what you can do to the shape of your face with six simple shades.  I tried to do the exaggerated lipliner for that crazy Kylie Jenner effect too, but the fact of the matter is she gets lip injections.  There are complicated contouring and highlighting techniques that can give the illusion of much larger lips, but that tends to require a couple shades of creamy concealer and I only have my match shade.  I just tried things with nude liner and liquid lipstick.

The liquid lipstick I used on my lips was also hard to work with outside of the natural lip line because once it sets on your skin, it dries within seconds and doesn’t budge.  You can’t make any adjustments or changes.  It’s seriously high quality stuff, but you do not wear it for comfort or ease of application.  I used Stila’s Stay All Day Liquid Lipstick in Patina.  You might be able to tell that the lip lines got a little smudgy because I tried to rub the lipstick off in some spots, but it didn’t work.  I basically had to go to bed with this stuff on and it is so unbelievably drying.  Not exactly the comforting, moisturizing formula you’d use in weather with a wind chill factor of -15 degrees.

IMG_1522

No filters here, I promise!  Just in front of a lamp (especially because it was night and there was no natural light to be found).  I’m under a bright light on the left side too, though.

I have to say, the transformative power of Youtube-inspired makeup is undeniable.  It works, especially in terms of making you feel glamorous and photo-ready.  However, it’s not a realistic everyday look for me and my life.  Now that I know I can do it though, maybe I’ll take a stab at it more than once a year.  I just wouldn’t want this to ever feel like the norm because that can take the fun and novelty out of it.  For now I’ll just be sure to keep washing my face and taking good care of my eyebrows.  xo, MR

Average Makeup For Average People!

If you know me, you know I’m a huge fan of trends.  I always look forward to what’s coming out next season, and I’m the first one to jump aboard the bandwagon when everyone starts wearing their hair a certain way (hellooooo, ombre for life).  And I love it!  Trends are a fun way to keep my look dynamic, and I find myself trying things I wouldn’t normally try once something pops up on the trend radar.

However, when it comes to the beauty trends I’ve seen floating around Instagram these days, I’m not as keen. You’ve heard me say these things before- Kardashian-style contouring, so-called strobing (which is just a trend word for highlighting, which has been around forever), exaggerated lipliner, and the bright red cream blush that is suddenly being applied to everyone’s undereye area because it apparently cancels out green undertones … why?  I will admit that all of these tricks can be exciting when it comes to the transformative power of makeup, but it’s become popular to go through these complex makeup routines for everyday life.  The Kardashian-Jenner women look fully made up and one hundred percent camera ready every single day, and by sharing all of this with their followers, they have caused millions of other women to aspire for the same.

However, this is not a very realistic thing for most folks to aspire to.  Wearing the kind of makeup each day that is meant for HD cameras is not only a lot of look for many people, but it is also difficult to put into practice.  It can be time consuming and expensive to apply a full routine of makeup each day like what we see on Instagram, and many would find it uncomfortable to wear that much to work or just out running errands.

So what might a full (keep in mind, full) makeup routine look like for the more average person?  One that still ups your typical makeup game, but doesn’t require any red undereye concealer or even false lashes?  We can get to all of that, but let’s start with something basic.  It is presumptuous of me to believe that I have any answers, but here’s my stab at it:

  1.  Start by prepping your skin.  Got a good moisturizer?  Slather it on.  Or a sunscreen?  Serum?  Whatever it is, put it on to get your skin moist and ready to receive product.
  2. .Take either your liquid or powder foundation and use a brush (fluffy or foundation, depending on whether you’re using liquid or powder) to apply a light layer.  Be certain that there is no line of demarcation on your jawline.  In other words, blend, blend, blend so there is no visible line where the makeup begins or ends.  Check your hairline, the smaller areas around lips, and your nose!
  3. Use an eyebrow pencil no more than two shades darker than your natural brows to lightly sketch in any gaps or anywhere that you’d like more definition.  Use a brow brush to brush them up, and then use a brow gel to set them.
  4. Take a blush or powder that’s just a shade or two darker than your skintone and, using a blush brush, make light, consistent strokes just beneath your cheekbones (and I used MAC’s blush in Buff, pictured below).  This will create some light definition.  I typically like to limit my contouring to this.  You can also use bronzer for this step.  Just be sure to blend well.
  5. Next, apply a cream concealer to the couple darkened spots on your face such as the undereye area and beneath your nostrils.  I like NARS Creamy Radiance Concealer, Kevyn Aucoin’s Sensual Skin Enhancer, and Yves Saint Laurent’s Touche Eclat, which all work as both concealers and highlighters.
    1. Here’s where I add a bit of highlighting- Along with the darkened places of your face, apply small dots of concealer to areas where light hits your face naturally.  See my picture below for a reference.  I’ve actually mimicked Chrissy Teigen’s methods here and I’ve found that these little spots work nicely.  I also added some around the lips.
    2. Then, use a concealer brush (or your finger, which will work) to blend in the concealer.  Try your best to find natural light when blending so you can see clearly.  It is hard to blend accurately and thoroughly in a poorly-lit bathroom.  Your face should appear to have some nice dimension and should appear highlighted, even glowing.  Obviously, the picture below is pre-blending.

IMG_08646.  To add some extra shimmer (or “champagne pop” as some have called it), take any shimmery highlighter such as MAC’s Mineralize SkinFinish in Soft And Gentle and apply it to the apples of your cheeks, your forehead, and a bit on your chin.

7.  For your eyes, I like to choose a neutral but flattering eyeshadow such as Burberry’s Pale Barley and blend it all over my lids, stopping at the browbone.  For just a little extra drama, I line my eyes with a darker, matte shadow like the bottom-left shade you see in the Dior Grege palette you see below.  Line the upper lid, line the lower lid.  Add some brown eyeliner to the waterline.  I’ve used the same CoverGirl one for a couple years.

Processed with VSCOcam with c1 preset

8.  The one thing I’ll go overboard on is mascara.  I take as much time as I want on this.  However many coats, however many different kinds.  Everything else is so neutral and light that I like to add that small dose of glamour with a ton of thick lashes.

9.  And finally, for lips, I just add a gloss!  No lipstick, no liner, just gloss.  Pick any flattering gloss you like.  I’ve been using Marc Jacobs Enamoured Hi-Shine Lip Lacquer in Love Buzz.

IMG_0876

Give all this a shot.  There’s no filter here, so this is how it turned out in natural light in front of a window.  I’d say the steps that make this a little more difficult for those who’d call themselves “beginners” are those involving the concealer as highlighter.  You can always skip those steps and just start with concealing the darkened areas or problems spots (like zits), and add some shimmery highlighting powder to your cheeks.  Play around with it, and let me know what works.  xo, MR